Difference between revisions of "Tortimer Island"
m |
AlexBot2004 (talk | contribs) (Rewriting, expanding) |
||
| Line 11: | Line 11: | ||
| nl-name = N/A | | nl-name = N/A | ||
| ru-name = N/A | | ru-name = N/A | ||
| − | | image = Tortimer Island | + | | image = NL Tortimer Island Beach.png |
| − | | caption = The beach | + | | caption = The beach area |
| − | | image2 = Island | + | | image2 = NL Tortimer Island Lobby.png |
| − | | caption2 = The | + | | caption2 = The lobby |
| − | | music = ''' | + | | music = '''Lobby'''<br>[[File:NL Tortimer Island – Tour Desk.flac]]<br>'''Beach area (day)'''<br>[[File:NL Tortimer Island – Day.flac]]<br>'''Beach area (night)'''<br>[[File:NL Tortimer Island – Night.flac]] |
| music-game= New Leaf | | music-game= New Leaf | ||
| − | | proprietor= [[Tortimer]]<br>[[Kapp'n]] <small>(transit to island)</small><br>[[Leilani]] <small>(transit from island, | + | | proprietor= [[Tortimer]] <small>(tour host)</small><br>[[Kapp'n]] <small>(transit to island)</small><br>[[Leilani]] <small>(transit from island, signing up for tours)</small><br>[[Leila]] <small>(selling items)</small><br>[[Grams]] <small>(shop)</small> |
| function = Tropical Island | | function = Tropical Island | ||
| time = All day | | time = All day | ||
}} | }} | ||
| − | '''Tortimer Island''' is a | + | '''Tortimer Island''' is a tropical island south of the player's [[town]] in {{NL}}. The island is accessed via a boat ride by [[Kapp'n]] from the town's [[Pier|dock]]. On the island is an interior lobby where [[Leilani]], [[Leila]], and [[Grams]] reside; the player can register for minigame [[Island Tour|tours]], purchase exclusive items, and sell items in the lobby. Outside is a circular island where the player can catch [[bugs]], [[fish]], and [[sea creatures]]. The climate on the island is always [[summer]]. |
| − | + | ==Unlocking and visiting== | |
| + | [[File:NL Kapp'n Boat.png|thumb|left|Kapp'n at the dock]] | ||
| + | After the player pays off their first [[home loan]], [[Tortimer]] appears at the town's dock the following day. After speaking to him, he tells the player that Kapp'n can take the player to Tortimer Island beginning the following day. | ||
| − | + | Once unlocked, the player can speak to Kapp'n at the dock to take a trip to the island for 1,000 [[Bell]]s. All items in the player's [[pockets]] are held by Kapp'n until returning to town. Up to four players (either residents or visitors) can visit the island. | |
| − | + | {{Clear|left}} | |
| − | |||
| − | |||
| − | + | ==Lobby== | |
| + | Inside the lobby on the island resides Kapp'n's family: Leilani, who lets the player go on minigame-like tours or travel back to the mainland; Grams, who runs a shop that sells exclusive items; and Leila, whom the player can sell items to. Additionally, there is an [[Savings|ABD]] in the building where the player can deposit and withdraw Bells. | ||
| − | + | A guide to the island's various features is located on the left-hand side of the tour counter where Leilani resides. | |
| − | + | ===Items Drop-Off Box=== | |
| + | Items received on the island must be placed in the Items Drop-Off Box, located next to Leilani, to be brought back to the mainland. Up to 40 items can be placed in the Items Drop-Off Box, and there is a corresponding box at the town's dock where the items can be collected upon the player's return. Any items left in the player's pockets upon returning to the mainland will be sold at Leila's rate of 5% of the standard sell price. | ||
| − | + | ===Tours=== | |
| + | {{Main|Island Tour}} | ||
| + | Tours are timed minigames hosted by Tortimer that task the player with completing a certain objective, such as catching a specific number of bugs or popping a certain number of [[balloon]]s. Completing the objective within the time limit rewards the player with [[medal]]s, which are used to purchase items from the island's shop. | ||
| − | === | + | ===Souvenir Shop=== |
| − | + | [[File:NL Souvenir Shop.png|thumb|left|The Souvenir Shop]] | |
| − | + | The Souveneir Shop is operated by Grams and sells four exclusive tropical- or island-themed items each day. Items are paid for with medals, and they are automatically sent to the Items Drop-Off Box upon purchase. | |
| − | + | {{Clear|left}} | |
| − | |||
| − | |||
| − | |||
| − | |||
| − | |||
| − | |||
| − | |||
| − | |||
| − | |||
| − | |||
| − | |||
| − | |||
| − | |||
| − | |||
| − | |||
| − | |||
| − | |||
| − | |||
| − | |||
| − | |||
| − | |||
| − | |||
| − | |||
| − | |||
| − | |||
| − | |||
| − | |||
| − | |||
| − | |||
| − | |||
| − | |||
| − | |||
| − | |||
| − | |||
| − | |||
| − | |||
| − | |||
| − | |||
| − | |||
| − | |||
| − | |||
| − | |||
| − | |||
| − | |||
| − | |||
| − | |||
| − | ==== | + | ====Items==== |
| − | + | The following items can appear at the Souvenir Shop: | |
| − | + | {{TableTop NL Multi|name=Souvenir Shop items|collapsed=true}} | |
| − | |||
| − | ===== Bugs | + | {{TableContent |
| − | {{TableTop NL Tortimer Island Bug|name=List of bugs on Tortimer Island}} | + | | Beach Chair |
| + | | [[File:Beach Chair NL Model.png|64px|Beach Chair]] | ||
| + | | Furniture | ||
| + | | {{Currency|Medals|35}} | ||
| + | | {{Currency|Bells|437}} | ||
| + | | {{Availability|Island Shop}} | ||
| + | }} | ||
| + | |||
| + | {{TableContent | ||
| + | | Beach Table | ||
| + | | [[File:Beach Table (Blue and White) NL Model.png|64px|Beach Table]] | ||
| + | | Furniture | ||
| + | | {{Currency|Medals|30}} | ||
| + | | {{Currency|Bells|375}} | ||
| + | | {{Availability|Island Shop}} | ||
| + | }} | ||
| + | |||
| + | {{TableContent | ||
| + | | Bottled Ship | ||
| + | | [[File:Bottled Ship NL Model.png|64px|Bottled Ship]] | ||
| + | | Furniture | ||
| + | | {{Currency|Medals|60}} | ||
| + | | {{Currency|Bells|750}} | ||
| + | | {{Availability|Island Shop|note=Club Tortimer}} | ||
| + | }} | ||
| + | |||
| + | {{TableContent | ||
| + | | Box of Chocolates | ||
| + | | [[File:Box of Chocolates NL Model.png|64px|Box of Chocolates]] | ||
| + | | Furniture | ||
| + | | {{Currency|Medals|20}} | ||
| + | | {{Currency|Bells|250}} | ||
| + | | {{Availability|Island Shop|note=Club Tortimer}} | ||
| + | }} | ||
| + | |||
| + | {{TableContent | ||
| + | | Cabana Armchair | ||
| + | | [[File:Cabana Armchair (Plain - White) NL Model.png|64px|Cabana Armchair]] | ||
| + | | Furniture | ||
| + | | {{Currency|Medals|40}} | ||
| + | | {{Currency|Bells|500}} | ||
| + | | {{Availability|Island Shop}} | ||
| + | }} | ||
| + | |||
| + | {{TableContent | ||
| + | | Cabana Bed | ||
| + | | [[File:Cabana Bed (Plain - White) NL Model.png|64px|Cabana Bed]] | ||
| + | | Furniture | ||
| + | | {{Currency|Medals|40}} | ||
| + | | {{Currency|Bells|500}} | ||
| + | | {{Availability|Island Shop}} | ||
| + | }} | ||
| + | |||
| + | {{TableContent | ||
| + | | Cabana Bookcase | ||
| + | | [[File:Cabana Bookcase (Plain) NL Model.png|64px|Cabana Bookcase]] | ||
| + | | Furniture | ||
| + | | {{Currency|Medals|40}} | ||
| + | | {{Currency|Bells|500}} | ||
| + | | {{Availability|Island Shop}} | ||
| + | }} | ||
| + | |||
| + | {{TableContent | ||
| + | | Cabana Chair | ||
| + | | [[File:Cabana Chair (Plain) NL Model.png|64px|Cabana Chair]] | ||
| + | | Furniture | ||
| + | | {{Currency|Medals|40}} | ||
| + | | {{Currency|Bells|500}} | ||
| + | | {{Availability|Island Shop}} | ||
| + | }} | ||
| + | |||
| + | {{TableContent | ||
| + | | Cabana Dresser | ||
| + | | [[File:Cabana Dresser (Plain) NL Model.png|64px|Cabana Dresser]] | ||
| + | | Furniture | ||
| + | | {{Currency|Medals|40}} | ||
| + | | {{Currency|Bells|500}} | ||
| + | | {{Availability|Island Shop}} | ||
| + | }} | ||
| + | |||
| + | {{TableContent | ||
| + | | Cabana Lamp | ||
| + | | [[File:Cabana Lamp (Plain) NL Model.png|64px|Cabana Lamp]] | ||
| + | | Furniture | ||
| + | | {{Currency|Medals|40}} | ||
| + | | {{Currency|Bells|500}} | ||
| + | | {{Availability|Island Shop}} | ||
| + | }} | ||
| + | |||
| + | {{TableContent | ||
| + | | Cabana Screen | ||
| + | | [[File:Cabana Screen (Plain) NL Model.png|64px|Cabana Screen]] | ||
| + | | Furniture | ||
| + | | {{Currency|Medals|40}} | ||
| + | | {{Currency|Bells|500}} | ||
| + | | {{Availability|Island Shop}} | ||
| + | }} | ||
| + | |||
| + | {{TableContent | ||
| + | | Cabana Table | ||
| + | | [[File:Cabana Table (Plain) NL Model.png|64px|Cabana Table]] | ||
| + | | Furniture | ||
| + | | {{Currency|Medals|40}} | ||
| + | | {{Currency|Bells|500}} | ||
| + | | {{Availability|Island Shop}} | ||
| + | }} | ||
| + | |||
| + | {{TableContent | ||
| + | | Cabana Vanity | ||
| + | | [[File:Cabana Vanity (Plain) NL Model.png|64px|Cabana Vanity]] | ||
| + | | Furniture | ||
| + | | {{Currency|Medals|40}} | ||
| + | | {{Currency|Bells|500}} | ||
| + | | {{Availability|Island Shop}} | ||
| + | }} | ||
| + | |||
| + | {{TableContent | ||
| + | | Cabana Wall Radio | ||
| + | | [[File:Cabana Wall Radio (Plain) NL Model.png|64px|Cabana Wall Radio]] | ||
| + | | Furniture | ||
| + | | {{Currency|Medals|40}} | ||
| + | | {{Currency|Bells|500}} | ||
| + | | {{Availability|Island Shop}} | ||
| + | }} | ||
| + | |||
| + | {{TableContent | ||
| + | | Cabana Wardrobe | ||
| + | | [[File:Cabana Wardrobe (Plain) NL Model.png|64px|Cabana Wardrobe]] | ||
| + | | Furniture | ||
| + | | {{Currency|Medals|40}} | ||
| + | | {{Currency|Bells|500}} | ||
| + | | {{Availability|Island Shop}} | ||
| + | }} | ||
| + | |||
| + | {{TableContent | ||
| + | | Diver Dan | ||
| + | | [[File:Diver Dan NL Model.png|64px|Diver Dan]] | ||
| + | | Furniture | ||
| + | | {{Currency|Medals|60}} | ||
| + | | {{Currency|Bells|750}} | ||
| + | | {{Availability|Island Shop}} | ||
| + | }} | ||
| + | |||
| + | {{TableContent | ||
| + | | Kitchen Island | ||
| + | | [[File:Kitchen Island NL Model.png|64px|Kitchen Island]] | ||
| + | | Furniture | ||
| + | | {{Currency|Medals|30}} | ||
| + | | {{Currency|Bells|375}} | ||
| + | | {{Availability|Island Shop}} | ||
| + | }} | ||
| + | |||
| + | {{TableContent | ||
| + | | Life Preserver | ||
| + | | [[File:Life Preserver (Blue) NL Model.png|64px|Life Preserver]] | ||
| + | | Furniture | ||
| + | | {{Currency|Medals|25}} | ||
| + | | {{Currency|Bells|312}} | ||
| + | | {{Availability|Island Shop}} | ||
| + | }} | ||
| + | |||
| + | {{TableContent | ||
| + | | Life Ring | ||
| + | | [[File:Life Ring (Red) NL Model.png|64px|Life Ring]] | ||
| + | | Furniture | ||
| + | | {{Currency|Medals|20}} | ||
| + | | {{Currency|Bells|250}} | ||
| + | | {{Availability|Island Shop}} | ||
| + | }} | ||
| + | |||
| + | {{TableContent | ||
| + | | Mermaid Bed | ||
| + | | [[File:Mermaid Bed NL Model.png|64px|Mermaid Bed]] | ||
| + | | Furniture | ||
| + | | {{Currency|Medals|40}} | ||
| + | | {{Currency|Bells|500}} | ||
| + | | {{Availability|Island Shop}} | ||
| + | }} | ||
| + | |||
| + | {{TableContent | ||
| + | | Mermaid Chair | ||
| + | | [[File:Mermaid Chair NL Model.png|64px|Mermaid Chair]] | ||
| + | | Furniture | ||
| + | | {{Currency|Medals|40}} | ||
| + | | {{Currency|Bells|500}} | ||
| + | | {{Availability|Island Shop}} | ||
| + | }} | ||
| + | |||
| + | {{TableContent | ||
| + | | Mermaid Clock | ||
| + | | [[File:Mermaid Clock NL Model.png|64px|Mermaid Clock]] | ||
| + | | Furniture | ||
| + | | {{Currency|Medals|}} | ||
| + | | {{Currency|Bells|}} | ||
| + | | {{Availability|Island Shop}} | ||
| + | }} | ||
| + | |||
| + | {{TableContent | ||
| + | | Mermaid Closet | ||
| + | | [[File:Mermaid Closet NL Model.png|64px|Mermaid Closet]] | ||
| + | | Furniture | ||
| + | | {{Currency|Medals|40}} | ||
| + | | {{Currency|Bells|500}} | ||
| + | | {{Availability|Island Shop}} | ||
| + | }} | ||
| + | |||
| + | {{TableContent | ||
| + | | Mermaid Dresser | ||
| + | | [[File:Mermaid Dresser NL Model.png|64px|Mermaid Dresser]] | ||
| + | | Furniture | ||
| + | | {{Currency|Medals|40}} | ||
| + | | {{Currency|Bells|500}} | ||
| + | | {{Availability|Island Shop}} | ||
| + | }} | ||
| + | |||
| + | {{TableContent | ||
| + | | Mermaid Lamp | ||
| + | | [[File:Mermaid Lamp NL Model.png|64px|Mermaid Lamp]] | ||
| + | | Furniture | ||
| + | | {{Currency|Medals|40}} | ||
| + | | {{Currency|Bells|500}} | ||
| + | | {{Availability|Island Shop}} | ||
| + | }} | ||
| + | |||
| + | {{TableContent | ||
| + | | Mermaid Screen | ||
| + | | [[File:Mermaid Screen NL Model.png|64px|Mermaid Screen]] | ||
| + | | Furniture | ||
| + | | {{Currency|Medals|40}} | ||
| + | | {{Currency|Bells|500}} | ||
| + | | {{Availability|Island Shop}} | ||
| + | }} | ||
| + | |||
| + | {{TableContent | ||
| + | | Mermaid Shelf | ||
| + | | [[File:Mermaid Shelf NL Model.png|64px|Mermaid Shelf]] | ||
| + | | Furniture | ||
| + | | {{Currency|Medals|40}} | ||
| + | | {{Currency|Bells|500}} | ||
| + | | {{Availability|Island Shop}} | ||
| + | }} | ||
| + | |||
| + | {{TableContent | ||
| + | | Mermaid Sofa | ||
| + | | [[File:Mermaid Sofa NL Model.png|64px|Mermaid Sofa]] | ||
| + | | Furniture | ||
| + | | {{Currency|Medals|40}} | ||
| + | | {{Currency|Bells|500}} | ||
| + | | {{Availability|Island Shop}} | ||
| + | }} | ||
| + | |||
| + | {{TableContent | ||
| + | | Mermaid Table | ||
| + | | [[File:Mermaid Table NL Model.png|64px|Mermaid Table]] | ||
| + | | Furniture | ||
| + | | {{Currency|Medals|40}} | ||
| + | | {{Currency|Bells|500}} | ||
| + | | {{Availability|Island Shop}} | ||
| + | }} | ||
| + | |||
| + | {{TableContent | ||
| + | | Mermaid Vanity | ||
| + | | [[File:Mermaid Vanity NL Model.png|64px|Mermaid Vanity]] | ||
| + | | Furniture | ||
| + | | {{Currency|Medals|40}} | ||
| + | | {{Currency|Bells|500}} | ||
| + | | {{Availability|Island Shop}} | ||
| + | }} | ||
| + | |||
| + | {{TableContent | ||
| + | | Sand Castle | ||
| + | | [[File:Sand Castle NL Model.png|64px|Sand Castle]] | ||
| + | | Furniture | ||
| + | | {{Currency|Medals|46}} | ||
| + | | {{Currency|Bells|575}} | ||
| + | | {{Availability|Island Shop|note=Club Tortimer}} | ||
| + | }} | ||
| + | |||
| + | {{TableContent | ||
| + | | Sanshin | ||
| + | | [[File:Sanshin NL Model.png|64px|Sanshin]] | ||
| + | | Furniture | ||
| + | | {{Currency|Medals|40}} | ||
| + | | {{Currency|Bells|500}} | ||
| + | | {{Availability|Island Shop}} | ||
| + | }} | ||
| + | |||
| + | {{TableContent | ||
| + | | Sea Globe | ||
| + | | [[File:Sea Globe NL Model.png|64px|Sea Globe]] | ||
| + | | Furniture | ||
| + | | {{Currency|Medals|20}} | ||
| + | | {{Currency|Bells|250}} | ||
| + | | {{Availability|Island Shop|note=Club Tortimer}} | ||
| + | }} | ||
| + | |||
| + | {{TableContent | ||
| + | | Treasure Chest | ||
| + | | [[File:Treasure Chest NL Model.png|64px|Treasure Chest]] | ||
| + | | Furniture | ||
| + | | {{Currency|Medals|150}} | ||
| + | | {{Currency|Bells|1875}} | ||
| + | | {{Availability|Island Shop}} | ||
| + | }} | ||
| + | |||
| + | {{TableContent | ||
| + | | Ukulele | ||
| + | | [[File:Ukulele NL Model.png|64px|Ukelele]] | ||
| + | | Furniture | ||
| + | | {{Currency|Medals|30}} | ||
| + | | {{Currency|Bells|375}} | ||
| + | | {{Availability|Island Shop|note=Club Tortimer}} | ||
| + | }} | ||
| + | |||
| + | {{TableContent | ||
| + | | Wave Breaker | ||
| + | | [[File:Wave Breaker NL Model.png|64px|Wave Breaker]] | ||
| + | | Furniture | ||
| + | | {{Currency|Medals|35}} | ||
| + | | {{Currency|Bells|437}} | ||
| + | | {{Availability|Island Shop}} | ||
| + | }} | ||
| + | |||
| + | {{TableContent | ||
| + | | Whirlpool Bath | ||
| + | | [[File:Whirlpool Bath (No Flowers) NL Model.png|64px|Whirlpool Bath]] | ||
| + | | Furniture | ||
| + | | {{Currency|Medals|70}} | ||
| + | | {{Currency|Bells|875}} | ||
| + | | {{Availability|Island Shop|note=Club Tortimer}} | ||
| + | }} | ||
| + | |||
| + | {{TableContent | ||
| + | | Cabana Wall | ||
| + | | [[File:Cabana Wall NL Model.png|64px|Cabana Wall]] | ||
| + | | Wallpaper | ||
| + | | {{Currency|Medals|40}} | ||
| + | | {{Currency|Bells|500}} | ||
| + | | {{Availability|Island Shop|note=Club Tortimer}} | ||
| + | }} | ||
| + | |||
| + | {{TableContent | ||
| + | | Mermaid Wall | ||
| + | | [[File:Mermaid Wall NL Model.png|64px|Mermaid Wall]] | ||
| + | | Wallpaper | ||
| + | | {{Currency|Medals|40}} | ||
| + | | {{Currency|Bells|500}} | ||
| + | | {{Availability|Island Shop}} | ||
| + | }} | ||
| + | |||
| + | {{TableContent | ||
| + | | Tropical Vista | ||
| + | | [[File:Tropical Vista NL Model.png|64px|Tropical Vista]] | ||
| + | | Wallpaper | ||
| + | | {{Currency|Medals|100}} | ||
| + | | {{Currency|Bells|1250}} | ||
| + | | {{Availability|Island Shop|note=Club Tortimer}} | ||
| + | }} | ||
| + | |||
| + | {{TableContent | ||
| + | | Cabana Flooring | ||
| + | | [[File:Cabana Flooring NL Model.png|64px|Cabana Flooring]] | ||
| + | | Flooring | ||
| + | | {{Currency|Medals|40}} | ||
| + | | {{Currency|Bells|500}} | ||
| + | | {{Availability|Island Shop|note=Club Tortimer}} | ||
| + | }} | ||
| + | |||
| + | {{TableContent | ||
| + | | Mermaid Carpet | ||
| + | | [[File:Mermaid Carpet NL Model.png|64px|Mermaid Carpet]] | ||
| + | | Flooring | ||
| + | | {{Currency|Medals|40}} | ||
| + | | {{Currency|Bells|500}} | ||
| + | | {{Availability|Island Shop}} | ||
| + | }} | ||
| + | |||
| + | {{TableContent | ||
| + | | Tropical Floor | ||
| + | | [[File:Tropical Floor NL Model.png|64px|Tropical Floor]] | ||
| + | | Flooring | ||
| + | | {{Currency|Medals|100}} | ||
| + | | {{Currency|Bells|1250}} | ||
| + | | {{Availability|Island Shop|note=Club Tortimer}} | ||
| + | }} | ||
| + | |||
| + | {{TableContent | ||
| + | | Blue Aloha Tee | ||
| + | | [[File:Blue Aloha Tee NL Model.png|64px|Blue Aloha Tee]] | ||
| + | | Clothing | ||
| + | | {{Currency|Medals|15}} | ||
| + | | {{Currency|Bells|187}} | ||
| + | | {{Availability|Island Shop}} | ||
| + | }} | ||
| + | |||
| + | {{TableContent | ||
| + | | Kappa Costume | ||
| + | | [[File:Kappa Costume NL Model.png|64px|Kappa Costume]] | ||
| + | | Clothing | ||
| + | | {{Currency|Medals|20}} | ||
| + | | {{Currency|Bells|250}} | ||
| + | | {{Availability|Island Shop|note=Club Tortimer}} | ||
| + | }} | ||
| + | |||
| + | {{TableContent | ||
| + | | Red Aloha Tee | ||
| + | | [[File:Red Aloha Tee NL Model.png|64px|Red Aloha Tee]] | ||
| + | | Clothing | ||
| + | | {{Currency|Medals|15}} | ||
| + | | {{Currency|Bells|187}} | ||
| + | | {{Availability|Island Shop}} | ||
| + | }} | ||
| + | |||
| + | {{TableContent | ||
| + | | Yellow Aloha Tee | ||
| + | | [[File:Yellow Aloha Tee NL Model.png|64px|Yellow Aloha Tee]] | ||
| + | | Clothing | ||
| + | | {{Currency|Medals|15}} | ||
| + | | {{Currency|Bells|187}} | ||
| + | | {{Availability|Island Shop|note=Club Tortimer}} | ||
| + | }} | ||
| + | |||
| + | {{TableContent | ||
| + | | Aloha Shorts | ||
| + | | [[File:Aloha Shorts NL Model.png|64px|Aloha Shorts]] | ||
| + | | Clothing | ||
| + | | {{Currency|Medals|15}} | ||
| + | | {{Currency|Bells|187}} | ||
| + | | {{Availability|Island Shop}} | ||
| + | }} | ||
| + | |||
| + | {{TableContent | ||
| + | | Kappa-Costume Pants | ||
| + | | [[File:Kappa-Costume Pants NL Model.png|64px|Kappa-Costume Pants]] | ||
| + | | Clothing | ||
| + | | {{Currency|Medals|15}} | ||
| + | | {{Currency|Bells|187}} | ||
| + | | {{Availability|Island Shop}} | ||
| + | }} | ||
| + | |||
| + | {{TableContent | ||
| + | | Muumuu | ||
| + | | [[File:Muumuu NL Model.png|64px|Muumuu]] | ||
| + | | Clothing | ||
| + | | {{Currency|Medals|15}} | ||
| + | | {{Currency|Bells|187}} | ||
| + | | {{Availability|Island Shop}} | ||
| + | }} | ||
| + | |||
| + | {{TableContent | ||
| + | | Captain's Hat | ||
| + | | [[File:Captain's Hat NL Model.png|64px|Captain's Hat]] | ||
| + | | Clothing | ||
| + | | {{Currency|Medals|15}} | ||
| + | | {{Currency|Bells|187}} | ||
| + | | {{Availability|Island Shop}} | ||
| + | }} | ||
| + | |||
| + | {{TableContent | ||
| + | | Hibiscus Hairpin | ||
| + | | [[File:Hibiscus Hairpin NL Model.png|64px|Hibiscus Hairpin]] | ||
| + | | Clothing | ||
| + | | {{Currency|Medals|20}} | ||
| + | | {{Currency|Bells|250}} | ||
| + | | {{Availability|Island Shop}} | ||
| + | }} | ||
| + | |||
| + | {{TableContent | ||
| + | | Kappa Cap | ||
| + | | [[File:Kappa Cap NL Model.png|64px|Kappa Cap]] | ||
| + | | Clothing | ||
| + | | {{Currency|Medals|20}} | ||
| + | | {{Currency|Bells|250}} | ||
| + | | {{Availability|Island Shop|note=Club Tortimer}} | ||
| + | }} | ||
| + | |||
| + | {{TableContent | ||
| + | | Pirate's Hat | ||
| + | | [[File:Pirate's Hat NL Model.png|64px|Pirate's Hat]] | ||
| + | | Clothing | ||
| + | | {{Currency|Medals|15}} | ||
| + | | {{Currency|Bells|187}} | ||
| + | | {{Availability|Island Shop}} | ||
| + | }} | ||
| + | |||
| + | {{TableContent | ||
| + | | Sailor's Hat | ||
| + | | [[File:Sailor's Hat NL Model.png|64px|Sailor's Hat]] | ||
| + | | Clothing | ||
| + | | {{Currency|Medals|15}} | ||
| + | | {{Currency|Bells|187}} | ||
| + | | {{Availability|Island Shop}} | ||
| + | }} | ||
| + | |||
| + | {{TableContent | ||
| + | | Straw Hat | ||
| + | | [[File:Straw Hat NL Model.png|64px|Straw Hat]] | ||
| + | | Clothing | ||
| + | | {{Currency|Medals|15}} | ||
| + | | {{Currency|Bells|187}} | ||
| + | | {{Availability|Island Shop}} | ||
| + | }} | ||
| + | |||
| + | {{TableContent | ||
| + | | Snorkel Mask | ||
| + | | [[File:Snorkel Mask NL Model.png|64px|Snorkel Mask]] | ||
| + | | Clothing | ||
| + | | {{Currency|Medals|20}} | ||
| + | | {{Currency|Bells|250}} | ||
| + | | {{Availability|Island Shop}} | ||
| + | }} | ||
| + | |||
| + | {{TableContent | ||
| + | | Flip-Flops | ||
| + | | [[File:Flip-Flops NL Model.png|64px|Flip-Flops]] | ||
| + | | Clothing | ||
| + | | {{Currency|Medals|20}} | ||
| + | | {{Currency|Bells|250}} | ||
| + | | {{Availability|Island Shop}} | ||
| + | }} | ||
| + | |||
| + | {{TableContent | ||
| + | | Black Wet Suit | ||
| + | | [[File:Black Wet Suit NL Model.png|64px|Black Wet Suit]] | ||
| + | | Clothing | ||
| + | | {{Currency|Medals|40}} | ||
| + | | {{Currency|Bells|500}} | ||
| + | | {{Availability|Island Shop}} | ||
| + | }} | ||
| + | |||
| + | {{TableContent | ||
| + | | Blue Wet Suit | ||
| + | | [[File:Blue Wet Suit NL Model.png|64px|Blue Wet Suit]] | ||
| + | | Clothing | ||
| + | | {{Currency|Medals|40}} | ||
| + | | {{Currency|Bells|500}} | ||
| + | | {{Availability|Island Shop}} | ||
| + | }} | ||
| + | |||
| + | {{TableContent | ||
| + | | Green Wet Suit | ||
| + | | [[File:Green Wet Suit NL Model.png|64px|Green Wet Suit]] | ||
| + | | Clothing | ||
| + | | {{Currency|Medals|40}} | ||
| + | | {{Currency|Bells|500}} | ||
| + | | {{Availability|Island Shop}} | ||
| + | }} | ||
| + | |||
| + | {{TableContent | ||
| + | | Orange Wet Suit | ||
| + | | [[File:Orange Wet Suit NL Model.png|64px|Orange Wet Suit]] | ||
| + | | Clothing | ||
| + | | {{Currency|Medals|40}} | ||
| + | | {{Currency|Bells|500}} | ||
| + | | {{Availability|Island Shop}} | ||
| + | }} | ||
| + | |||
| + | {{TableContent | ||
| + | | Pink Wet Suit | ||
| + | | [[File:Pink Wet Suit NL Model.png|64px|Pink Wet Suit]] | ||
| + | | Clothing | ||
| + | | {{Currency|Medals|40}} | ||
| + | | {{Currency|Bells|500}} | ||
| + | | {{Availability|Island Shop}} | ||
| + | }} | ||
| + | |||
| + | {{TableContent | ||
| + | | Striped Wet Suit | ||
| + | | [[File:Striped Wet Suit NL Model.png|64px|Striped Wet Suit]] | ||
| + | | Clothing | ||
| + | | {{Currency|Medals|40}} | ||
| + | | {{Currency|Bells|500}} | ||
| + | | {{Availability|Island Shop}} | ||
| + | }} | ||
| + | |||
| + | {{TableContent | ||
| + | | White Wet Suit | ||
| + | | [[File:White Wet Suit NL Model.png|64px|White Wet Suit]] | ||
| + | | Clothing | ||
| + | | {{Currency|Medals|40}} | ||
| + | | {{Currency|Bells|500}} | ||
| + | | {{Availability|Island Shop}} | ||
| + | }} | ||
| + | |||
| + | {{TableContent | ||
| + | | Silver Axe | ||
| + | | [[File:Silver Axe NL Icon.png|64px|class=sprite|Silver Axe]] | ||
| + | | Equipment | ||
| + | | {{Currency|Medals|8}} | ||
| + | | {{Currency|Bells|100}} | ||
| + | | {{Availability|Island Shop|note=Club Tortimer}} | ||
| + | }} | ||
| + | |||
| + | {{TableContent | ||
| + | | Toy Hammer | ||
| + | | [[File:Toy Hammer NL Icon.png|64px|class=sprite|Toy Hammer]] | ||
| + | | Equipment | ||
| + | | {{Currency|Medals|10}} | ||
| + | | {{Currency|Bells|125}} | ||
| + | | {{Availability|Island Shop}} | ||
| + | }} | ||
| + | |||
| + | {{TableContent | ||
| + | | Red-Hibiscus Start | ||
| + | | [[File:Start NL Icon.png|64px|class=sprite|Red-Hibiscus Start]] | ||
| + | | Other | ||
| + | | {{Currency|Medals|5}} | ||
| + | | {{Currency|Bells|62}} | ||
| + | | {{Availability|Island Shop}} | ||
| + | }} | ||
| + | |||
| + | {{TableContent | ||
| + | | Y.-Hibiscus Start | ||
| + | | [[File:Start NL Icon.png|64px|class=sprite|Y.-Hibiscus Start]] | ||
| + | | Other | ||
| + | | {{Currency|Medals|5}} | ||
| + | | {{Currency|Bells|62}} | ||
| + | | {{Availability|Island Shop}} | ||
| + | }} | ||
| + | |||
| + | {{TableFooter|note={{Community:ACNL Spreadsheet/Attribution}}}} | ||
| + | |||
| + | ===Leila's supermarket=== | ||
| + | [[File:NL Leila.png|thumb|left|Leila's supermarket]] | ||
| + | The player can speak to Leila to "play supermarket," where items can be sold to her for 5% of their standard sell price. | ||
| + | {{Clear}} | ||
| + | |||
| + | ==Beach area== | ||
| + | [[File:NL Tortimer Island Grass.png|thumb|The grassy center of the beach area]] | ||
| + | The outside of Tortimer Island consists of a grassy center surrounded by beach. By default, exotic [[fruit]] trees,{{Note|The fruit on the trees can either be Durians, Lemons, Lychees, or Mangoes.}} hibiscus bushes, and flowers are in the grassy area, while either Coconut or Banana trees line the beach. Additionally, [[shells]] spawn on the shore each day. | ||
| + | |||
| + | [[Lloid]] appears near the entrance to the building and lets the player borrow rental [[tool]]s. | ||
| + | |||
| + | ===Creatures=== | ||
| + | The creatures on the island are the same year-round, and some can only be caught on the island. | ||
| + | |||
| + | :[[File:Yellowhibiscusacnl.png|link=]] = Found exclusively on Tortimer Island. | ||
| + | |||
| + | ====Bugs==== | ||
| + | {{TableTop NL Tortimer Island Bug|name=List of bugs on Tortimer Island|collapsed=true}} | ||
{{#cargo_query: | {{#cargo_query: | ||
table=nl_bug | table=nl_bug | ||
|group by=name | |group by=name | ||
|fields=number,_pageName=pagename,name,image,sell,sell_pre_wa=sell-pre-wa,location,location2,tortimer_island_time=tortimer-island-time,on_tortimer_island=on-tortimer-island,on_island_tour=on-island-tour,size=size,rarity | |fields=number,_pageName=pagename,name,image,sell,sell_pre_wa=sell-pre-wa,location,location2,tortimer_island_time=tortimer-island-time,on_tortimer_island=on-tortimer-island,on_island_tour=on-island-tour,size=size,rarity | ||
| − | |where=on_tortimer_island | + | |where=on_tortimer_island=1 |
|order by=number | |order by=number | ||
|format=template | |format=template | ||
| Line 110: | Line 706: | ||
{{TableFooter|color=bug}} | {{TableFooter|color=bug}} | ||
| − | + | ====Fish==== | |
| − | {{TableTop NL Tortimer Island Fish|name=List of fish on Tortimer Island}} | + | {{TableTop NL Tortimer Island Fish|name=List of fish on Tortimer Island|collapsed=true}} |
{{#cargo_query: | {{#cargo_query: | ||
table=nl_fish | table=nl_fish | ||
|group by=name | |group by=name | ||
|fields=number,_pageName=pagename,name,image,sell=sell,shadow_size=shadow,location,time,on_tortimer_island=on-tortimer-island,on_island_tour=on-island-tour,fish_size=fish-size | |fields=number,_pageName=pagename,name,image,sell=sell,shadow_size=shadow,location,time,on_tortimer_island=on-tortimer-island,on_island_tour=on-island-tour,fish_size=fish-size | ||
| − | |where=on_tortimer_island | + | |where=on_tortimer_island=1 |
|order by=number | |order by=number | ||
|format=template | |format=template | ||
| Line 125: | Line 721: | ||
{{TableFooter|color=fish}} | {{TableFooter|color=fish}} | ||
| − | + | ====Sea creatures==== | |
| − | {{TableTop NL Tortimer Island Sea Creature|name=List of sea creatures on Tortimer Island}} | + | {{TableTop NL Tortimer Island Sea Creature|name=List of sea creatures on Tortimer Island|collapsed=true}} |
{{#cargo_query: | {{#cargo_query: | ||
table=nl_sea_creature | table=nl_sea_creature | ||
|group by=name | |group by=name | ||
|fields=number,_pageName=pagename,name,image,sell,shadow_size=shadow-size,shadow_movement=shadow-movement,time,time_availability=time-availability,time2,time2_availability=time2-availability,on_tortimer_island=on-tortimer-island,on_island_tour=on-island-tour,rarity,location,sea_creature_size=sea-creature-size | |fields=number,_pageName=pagename,name,image,sell,shadow_size=shadow-size,shadow_movement=shadow-movement,time,time_availability=time-availability,time2,time2_availability=time2-availability,on_tortimer_island=on-tortimer-island,on_island_tour=on-island-tour,rarity,location,sea_creature_size=sea-creature-size | ||
| − | |where=on_tortimer_island | + | |where=on_tortimer_island=1 |
|order by=number | |order by=number | ||
|format=template | |format=template | ||
| Line 140: | Line 736: | ||
{{TableFooter|color=fish}} | {{TableFooter|color=fish}} | ||
| − | + | ==Club Tortimer== | |
| + | Club Tortimer is a feature that allows the player to meet at a version of Tortimer Island with other random players online. The application form for Club Tortimer can be purchased from the island shop for 50 medals. When playing online via Club Tortimer, the Souvenir Shop can sell exclusive items not available in singleplayer. | ||
| − | == Other appearances == | + | ==Other appearances== |
| − | ===In the ''Super Smash Bros'' series=== | + | ===In the ''Super Smash Bros.'' series=== |
| + | [[File:SSBU Tortimer Island.png|thumb|The Tortimer Island stage in {{SSBU|nolink}}]] | ||
{{Main|Tortimer Island (stage)}} | {{Main|Tortimer Island (stage)}} | ||
| − | In the ''Super Smash Bros.'' series, Tortimer Island is featured as a stage in {{SSB4|3ds}} and {{SSBU}}. | + | In the ''[[Super Smash Bros.]]'' series, Tortimer Island is featured as a stage in {{SSB4|3ds}} and {{SSBU}}. |
| + | {{Clear}} | ||
==Gallery== | ==Gallery== | ||
<gallery> | <gallery> | ||
| − | + | NL Tortimer Island Shop.jpg|Four players in the lobby | |
| − | + | NL Tortimer Island Tour Counter.png|The tour counter | |
| − | + | NL Tortimer Island Waiting Area.png|The tour waiting area | |
| − | + | NL Tortimer Island Going Home.jpg|Leilani asking the player if they want to return to the mainland | |
| − | NL Tortimer Island | + | NL Grams Discusses the Box.jpg|Grams telling the player about the Souvenir Shop |
| − | NL Can't | + | NL Leila Playing Supermarket.png|The player playing supermarket with Leila |
| − | Running | + | NL Leila.jpg|The player playing supermarket with Leila |
| − | + | NL Tortimer Island Items Drop-Off Box.png|The player accessing the Items Drop-Off Box | |
| − | Island | + | NL Can't Edit the Designs on Tortimer Island.jpg|Designs cannot be edited on Tortimer Island |
| + | NL Tortimer Island Lobby Exterior.png|The exterior of the lobby | ||
| + | NL Running Around the Tortimer Island.jpg|The player running around the island | ||
| + | NL Showing Birdwing Butterfly.png|The player showing off a [[Queen Alexandra's Birdwing|Birdwing Butterfly]] on the island | ||
| + | NL Tortimer Island Renting Tools.png|The player renting tools from Lloid | ||
</gallery> | </gallery> | ||
| − | == | + | ==Notes== |
| − | + | {{Note list}} | |
{{Locations}} | {{Locations}} | ||
| − | |||
[[Category:New Leaf locations]] | [[Category:New Leaf locations]] | ||
Revision as of 16:43, January 29, 2022
- This page is about the location in Animal Crossing: New Leaf. For the stage in Super Smash Bros. for Nintendo 3DS and Super Smash Bros. Ultimate, see Tortimer Island (stage).
| ||||||
 The beach area  The lobby | ||||||
| Music (New Leaf) | ||||||
|---|---|---|---|---|---|---|
| Lobby Beach area (day) Beach area (night) | ||||||
| Function | Tropical Island | |||||
| Staff | Tortimer (tour host) Kapp'n (transit to island) Leilani (transit from island, signing up for tours) Leila (selling items) Grams (shop) | |||||
| Opening Hours | All day | |||||
| Main appearances | ||||||
|
| ||||||
| Other appearances | ||||||
Names in other languages
リゾートアイランド
Unknown Unknown Unknown
N/A
Unknown Unknown N/A
N/A Unknown Unknown N/A | ||||||
Tortimer Island is a tropical island south of the player's town in Animal Crossing: New Leaf. The island is accessed via a boat ride by Kapp'n from the town's dock. On the island is an interior lobby where Leilani, Leila, and Grams reside; the player can register for minigame tours, purchase exclusive items, and sell items in the lobby. Outside is a circular island where the player can catch bugs, fish, and sea creatures. The climate on the island is always summer.
Unlocking and visiting

After the player pays off their first home loan, Tortimer appears at the town's dock the following day. After speaking to him, he tells the player that Kapp'n can take the player to Tortimer Island beginning the following day.
Once unlocked, the player can speak to Kapp'n at the dock to take a trip to the island for 1,000 Bells. All items in the player's pockets are held by Kapp'n until returning to town. Up to four players (either residents or visitors) can visit the island.
Lobby
Inside the lobby on the island resides Kapp'n's family: Leilani, who lets the player go on minigame-like tours or travel back to the mainland; Grams, who runs a shop that sells exclusive items; and Leila, whom the player can sell items to. Additionally, there is an ABD in the building where the player can deposit and withdraw Bells.
A guide to the island's various features is located on the left-hand side of the tour counter where Leilani resides.
Items Drop-Off Box
Items received on the island must be placed in the Items Drop-Off Box, located next to Leilani, to be brought back to the mainland. Up to 40 items can be placed in the Items Drop-Off Box, and there is a corresponding box at the town's dock where the items can be collected upon the player's return. Any items left in the player's pockets upon returning to the mainland will be sold at Leila's rate of 5% of the standard sell price.
Tours
Tours are timed minigames hosted by Tortimer that task the player with completing a certain objective, such as catching a specific number of bugs or popping a certain number of balloons. Completing the objective within the time limit rewards the player with medals, which are used to purchase items from the island's shop.
Souvenir Shop

The Souveneir Shop is operated by Grams and sells four exclusive tropical- or island-themed items each day. Items are paid for with medals, and they are automatically sent to the Items Drop-Off Box upon purchase.
Items
The following items can appear at the Souvenir Shop:
| style="background-color:#ffffff; border-bottom: 4px solid #FFDD66; border-top-left-radius: 20px; border-bottom-left-radius: 20px;" | Beach Chair
| style="background-color:#ffffff; border-bottom: 4px solid #FFDD66; " |  | style="background-color:#ffffff; border-bottom: 4px solid #FFDD66; " | Furniture
| style="background-color:#ffffff; border-bottom: 4px solid #FFDD66; " |
| style="background-color:#ffffff; border-bottom: 4px solid #FFDD66; " | Furniture
| style="background-color:#ffffff; border-bottom: 4px solid #FFDD66; " | ![]() 35 medals
| style="background-color:#ffffff; border-bottom: 4px solid #FFDD66; " |
35 medals
| style="background-color:#ffffff; border-bottom: 4px solid #FFDD66; " | ![]() 437 Bells
| style="background-color:#ffffff; border-bottom: 4px solid #FFDD66; border-top-right-radius: 20px; border-bottom-right-radius: 20px;" | Island Shop
437 Bells
| style="background-color:#ffffff; border-bottom: 4px solid #FFDD66; border-top-right-radius: 20px; border-bottom-right-radius: 20px;" | Island Shop
|-
| style="background-color:#ffffff; border-bottom: 4px solid #FFDD66; border-top-left-radius: 20px; border-bottom-left-radius: 20px;" | Beach Table
| style="background-color:#ffffff; border-bottom: 4px solid #FFDD66; " | _NL_Model.png) | style="background-color:#ffffff; border-bottom: 4px solid #FFDD66; " | Furniture
| style="background-color:#ffffff; border-bottom: 4px solid #FFDD66; " |
| style="background-color:#ffffff; border-bottom: 4px solid #FFDD66; " | Furniture
| style="background-color:#ffffff; border-bottom: 4px solid #FFDD66; " | ![]() 30 medals
| style="background-color:#ffffff; border-bottom: 4px solid #FFDD66; " |
30 medals
| style="background-color:#ffffff; border-bottom: 4px solid #FFDD66; " | ![]() 375 Bells
| style="background-color:#ffffff; border-bottom: 4px solid #FFDD66; border-top-right-radius: 20px; border-bottom-right-radius: 20px;" | Island Shop
375 Bells
| style="background-color:#ffffff; border-bottom: 4px solid #FFDD66; border-top-right-radius: 20px; border-bottom-right-radius: 20px;" | Island Shop
|-
| style="background-color:#ffffff; border-bottom: 4px solid #FFDD66; border-top-left-radius: 20px; border-bottom-left-radius: 20px;" | Bottled Ship
| style="background-color:#ffffff; border-bottom: 4px solid #FFDD66; " |  | style="background-color:#ffffff; border-bottom: 4px solid #FFDD66; " | Furniture
| style="background-color:#ffffff; border-bottom: 4px solid #FFDD66; " |
| style="background-color:#ffffff; border-bottom: 4px solid #FFDD66; " | Furniture
| style="background-color:#ffffff; border-bottom: 4px solid #FFDD66; " | ![]() 60 medals
| style="background-color:#ffffff; border-bottom: 4px solid #FFDD66; " |
60 medals
| style="background-color:#ffffff; border-bottom: 4px solid #FFDD66; " | ![]() 750 Bells
| style="background-color:#ffffff; border-bottom: 4px solid #FFDD66; border-top-right-radius: 20px; border-bottom-right-radius: 20px;" | Island Shop (Club Tortimer)
750 Bells
| style="background-color:#ffffff; border-bottom: 4px solid #FFDD66; border-top-right-radius: 20px; border-bottom-right-radius: 20px;" | Island Shop (Club Tortimer)
|-
| style="background-color:#ffffff; border-bottom: 4px solid #FFDD66; border-top-left-radius: 20px; border-bottom-left-radius: 20px;" | Box of Chocolates
| style="background-color:#ffffff; border-bottom: 4px solid #FFDD66; " |  | style="background-color:#ffffff; border-bottom: 4px solid #FFDD66; " | Furniture
| style="background-color:#ffffff; border-bottom: 4px solid #FFDD66; " |
| style="background-color:#ffffff; border-bottom: 4px solid #FFDD66; " | Furniture
| style="background-color:#ffffff; border-bottom: 4px solid #FFDD66; " | ![]() 20 medals
| style="background-color:#ffffff; border-bottom: 4px solid #FFDD66; " |
20 medals
| style="background-color:#ffffff; border-bottom: 4px solid #FFDD66; " | ![]() 250 Bells
| style="background-color:#ffffff; border-bottom: 4px solid #FFDD66; border-top-right-radius: 20px; border-bottom-right-radius: 20px;" | Island Shop (Club Tortimer)
250 Bells
| style="background-color:#ffffff; border-bottom: 4px solid #FFDD66; border-top-right-radius: 20px; border-bottom-right-radius: 20px;" | Island Shop (Club Tortimer)
|-
| style="background-color:#ffffff; border-bottom: 4px solid #FFDD66; border-top-left-radius: 20px; border-bottom-left-radius: 20px;" | Cabana Armchair
| style="background-color:#ffffff; border-bottom: 4px solid #FFDD66; " | _NL_Model.png) | style="background-color:#ffffff; border-bottom: 4px solid #FFDD66; " | Furniture
| style="background-color:#ffffff; border-bottom: 4px solid #FFDD66; " |
| style="background-color:#ffffff; border-bottom: 4px solid #FFDD66; " | Furniture
| style="background-color:#ffffff; border-bottom: 4px solid #FFDD66; " | ![]() 40 medals
| style="background-color:#ffffff; border-bottom: 4px solid #FFDD66; " |
40 medals
| style="background-color:#ffffff; border-bottom: 4px solid #FFDD66; " | ![]() 500 Bells
| style="background-color:#ffffff; border-bottom: 4px solid #FFDD66; border-top-right-radius: 20px; border-bottom-right-radius: 20px;" | Island Shop
500 Bells
| style="background-color:#ffffff; border-bottom: 4px solid #FFDD66; border-top-right-radius: 20px; border-bottom-right-radius: 20px;" | Island Shop
|-
| style="background-color:#ffffff; border-bottom: 4px solid #FFDD66; border-top-left-radius: 20px; border-bottom-left-radius: 20px;" | Cabana Bed
| style="background-color:#ffffff; border-bottom: 4px solid #FFDD66; " | _NL_Model.png) | style="background-color:#ffffff; border-bottom: 4px solid #FFDD66; " | Furniture
| style="background-color:#ffffff; border-bottom: 4px solid #FFDD66; " |
| style="background-color:#ffffff; border-bottom: 4px solid #FFDD66; " | Furniture
| style="background-color:#ffffff; border-bottom: 4px solid #FFDD66; " | ![]() 40 medals
| style="background-color:#ffffff; border-bottom: 4px solid #FFDD66; " |
40 medals
| style="background-color:#ffffff; border-bottom: 4px solid #FFDD66; " | ![]() 500 Bells
| style="background-color:#ffffff; border-bottom: 4px solid #FFDD66; border-top-right-radius: 20px; border-bottom-right-radius: 20px;" | Island Shop
500 Bells
| style="background-color:#ffffff; border-bottom: 4px solid #FFDD66; border-top-right-radius: 20px; border-bottom-right-radius: 20px;" | Island Shop
|-
| style="background-color:#ffffff; border-bottom: 4px solid #FFDD66; border-top-left-radius: 20px; border-bottom-left-radius: 20px;" | Cabana Bookcase
| style="background-color:#ffffff; border-bottom: 4px solid #FFDD66; " | _NL_Model.png) | style="background-color:#ffffff; border-bottom: 4px solid #FFDD66; " | Furniture
| style="background-color:#ffffff; border-bottom: 4px solid #FFDD66; " |
| style="background-color:#ffffff; border-bottom: 4px solid #FFDD66; " | Furniture
| style="background-color:#ffffff; border-bottom: 4px solid #FFDD66; " | ![]() 40 medals
| style="background-color:#ffffff; border-bottom: 4px solid #FFDD66; " |
40 medals
| style="background-color:#ffffff; border-bottom: 4px solid #FFDD66; " | ![]() 500 Bells
| style="background-color:#ffffff; border-bottom: 4px solid #FFDD66; border-top-right-radius: 20px; border-bottom-right-radius: 20px;" | Island Shop
500 Bells
| style="background-color:#ffffff; border-bottom: 4px solid #FFDD66; border-top-right-radius: 20px; border-bottom-right-radius: 20px;" | Island Shop
|-
| style="background-color:#ffffff; border-bottom: 4px solid #FFDD66; border-top-left-radius: 20px; border-bottom-left-radius: 20px;" | Cabana Chair
| style="background-color:#ffffff; border-bottom: 4px solid #FFDD66; " | _NL_Model.png) | style="background-color:#ffffff; border-bottom: 4px solid #FFDD66; " | Furniture
| style="background-color:#ffffff; border-bottom: 4px solid #FFDD66; " |
| style="background-color:#ffffff; border-bottom: 4px solid #FFDD66; " | Furniture
| style="background-color:#ffffff; border-bottom: 4px solid #FFDD66; " | ![]() 40 medals
| style="background-color:#ffffff; border-bottom: 4px solid #FFDD66; " |
40 medals
| style="background-color:#ffffff; border-bottom: 4px solid #FFDD66; " | ![]() 500 Bells
| style="background-color:#ffffff; border-bottom: 4px solid #FFDD66; border-top-right-radius: 20px; border-bottom-right-radius: 20px;" | Island Shop
500 Bells
| style="background-color:#ffffff; border-bottom: 4px solid #FFDD66; border-top-right-radius: 20px; border-bottom-right-radius: 20px;" | Island Shop
|-
| style="background-color:#ffffff; border-bottom: 4px solid #FFDD66; border-top-left-radius: 20px; border-bottom-left-radius: 20px;" | Cabana Dresser
| style="background-color:#ffffff; border-bottom: 4px solid #FFDD66; " | _NL_Model.png) | style="background-color:#ffffff; border-bottom: 4px solid #FFDD66; " | Furniture
| style="background-color:#ffffff; border-bottom: 4px solid #FFDD66; " |
| style="background-color:#ffffff; border-bottom: 4px solid #FFDD66; " | Furniture
| style="background-color:#ffffff; border-bottom: 4px solid #FFDD66; " | ![]() 40 medals
| style="background-color:#ffffff; border-bottom: 4px solid #FFDD66; " |
40 medals
| style="background-color:#ffffff; border-bottom: 4px solid #FFDD66; " | ![]() 500 Bells
| style="background-color:#ffffff; border-bottom: 4px solid #FFDD66; border-top-right-radius: 20px; border-bottom-right-radius: 20px;" | Island Shop
500 Bells
| style="background-color:#ffffff; border-bottom: 4px solid #FFDD66; border-top-right-radius: 20px; border-bottom-right-radius: 20px;" | Island Shop
|-
| style="background-color:#ffffff; border-bottom: 4px solid #FFDD66; border-top-left-radius: 20px; border-bottom-left-radius: 20px;" | Cabana Lamp
| style="background-color:#ffffff; border-bottom: 4px solid #FFDD66; " | _NL_Model.png) | style="background-color:#ffffff; border-bottom: 4px solid #FFDD66; " | Furniture
| style="background-color:#ffffff; border-bottom: 4px solid #FFDD66; " |
| style="background-color:#ffffff; border-bottom: 4px solid #FFDD66; " | Furniture
| style="background-color:#ffffff; border-bottom: 4px solid #FFDD66; " | ![]() 40 medals
| style="background-color:#ffffff; border-bottom: 4px solid #FFDD66; " |
40 medals
| style="background-color:#ffffff; border-bottom: 4px solid #FFDD66; " | ![]() 500 Bells
| style="background-color:#ffffff; border-bottom: 4px solid #FFDD66; border-top-right-radius: 20px; border-bottom-right-radius: 20px;" | Island Shop
500 Bells
| style="background-color:#ffffff; border-bottom: 4px solid #FFDD66; border-top-right-radius: 20px; border-bottom-right-radius: 20px;" | Island Shop
|-
| style="background-color:#ffffff; border-bottom: 4px solid #FFDD66; border-top-left-radius: 20px; border-bottom-left-radius: 20px;" | Cabana Screen
| style="background-color:#ffffff; border-bottom: 4px solid #FFDD66; " | _NL_Model.png) | style="background-color:#ffffff; border-bottom: 4px solid #FFDD66; " | Furniture
| style="background-color:#ffffff; border-bottom: 4px solid #FFDD66; " |
| style="background-color:#ffffff; border-bottom: 4px solid #FFDD66; " | Furniture
| style="background-color:#ffffff; border-bottom: 4px solid #FFDD66; " | ![]() 40 medals
| style="background-color:#ffffff; border-bottom: 4px solid #FFDD66; " |
40 medals
| style="background-color:#ffffff; border-bottom: 4px solid #FFDD66; " | ![]() 500 Bells
| style="background-color:#ffffff; border-bottom: 4px solid #FFDD66; border-top-right-radius: 20px; border-bottom-right-radius: 20px;" | Island Shop
500 Bells
| style="background-color:#ffffff; border-bottom: 4px solid #FFDD66; border-top-right-radius: 20px; border-bottom-right-radius: 20px;" | Island Shop
|-
| style="background-color:#ffffff; border-bottom: 4px solid #FFDD66; border-top-left-radius: 20px; border-bottom-left-radius: 20px;" | Cabana Table
| style="background-color:#ffffff; border-bottom: 4px solid #FFDD66; " | _NL_Model.png) | style="background-color:#ffffff; border-bottom: 4px solid #FFDD66; " | Furniture
| style="background-color:#ffffff; border-bottom: 4px solid #FFDD66; " |
| style="background-color:#ffffff; border-bottom: 4px solid #FFDD66; " | Furniture
| style="background-color:#ffffff; border-bottom: 4px solid #FFDD66; " | ![]() 40 medals
| style="background-color:#ffffff; border-bottom: 4px solid #FFDD66; " |
40 medals
| style="background-color:#ffffff; border-bottom: 4px solid #FFDD66; " | ![]() 500 Bells
| style="background-color:#ffffff; border-bottom: 4px solid #FFDD66; border-top-right-radius: 20px; border-bottom-right-radius: 20px;" | Island Shop
500 Bells
| style="background-color:#ffffff; border-bottom: 4px solid #FFDD66; border-top-right-radius: 20px; border-bottom-right-radius: 20px;" | Island Shop
|-
| style="background-color:#ffffff; border-bottom: 4px solid #FFDD66; border-top-left-radius: 20px; border-bottom-left-radius: 20px;" | Cabana Vanity
| style="background-color:#ffffff; border-bottom: 4px solid #FFDD66; " | _NL_Model.png) | style="background-color:#ffffff; border-bottom: 4px solid #FFDD66; " | Furniture
| style="background-color:#ffffff; border-bottom: 4px solid #FFDD66; " |
| style="background-color:#ffffff; border-bottom: 4px solid #FFDD66; " | Furniture
| style="background-color:#ffffff; border-bottom: 4px solid #FFDD66; " | ![]() 40 medals
| style="background-color:#ffffff; border-bottom: 4px solid #FFDD66; " |
40 medals
| style="background-color:#ffffff; border-bottom: 4px solid #FFDD66; " | ![]() 500 Bells
| style="background-color:#ffffff; border-bottom: 4px solid #FFDD66; border-top-right-radius: 20px; border-bottom-right-radius: 20px;" | Island Shop
500 Bells
| style="background-color:#ffffff; border-bottom: 4px solid #FFDD66; border-top-right-radius: 20px; border-bottom-right-radius: 20px;" | Island Shop
|-
| style="background-color:#ffffff; border-bottom: 4px solid #FFDD66; border-top-left-radius: 20px; border-bottom-left-radius: 20px;" | Cabana Wall Radio
| style="background-color:#ffffff; border-bottom: 4px solid #FFDD66; " | _NL_Model.png) | style="background-color:#ffffff; border-bottom: 4px solid #FFDD66; " | Furniture
| style="background-color:#ffffff; border-bottom: 4px solid #FFDD66; " |
| style="background-color:#ffffff; border-bottom: 4px solid #FFDD66; " | Furniture
| style="background-color:#ffffff; border-bottom: 4px solid #FFDD66; " | ![]() 40 medals
| style="background-color:#ffffff; border-bottom: 4px solid #FFDD66; " |
40 medals
| style="background-color:#ffffff; border-bottom: 4px solid #FFDD66; " | ![]() 500 Bells
| style="background-color:#ffffff; border-bottom: 4px solid #FFDD66; border-top-right-radius: 20px; border-bottom-right-radius: 20px;" | Island Shop
500 Bells
| style="background-color:#ffffff; border-bottom: 4px solid #FFDD66; border-top-right-radius: 20px; border-bottom-right-radius: 20px;" | Island Shop
|-
| style="background-color:#ffffff; border-bottom: 4px solid #FFDD66; border-top-left-radius: 20px; border-bottom-left-radius: 20px;" | Cabana Wardrobe
| style="background-color:#ffffff; border-bottom: 4px solid #FFDD66; " | _NL_Model.png) | style="background-color:#ffffff; border-bottom: 4px solid #FFDD66; " | Furniture
| style="background-color:#ffffff; border-bottom: 4px solid #FFDD66; " |
| style="background-color:#ffffff; border-bottom: 4px solid #FFDD66; " | Furniture
| style="background-color:#ffffff; border-bottom: 4px solid #FFDD66; " | ![]() 40 medals
| style="background-color:#ffffff; border-bottom: 4px solid #FFDD66; " |
40 medals
| style="background-color:#ffffff; border-bottom: 4px solid #FFDD66; " | ![]() 500 Bells
| style="background-color:#ffffff; border-bottom: 4px solid #FFDD66; border-top-right-radius: 20px; border-bottom-right-radius: 20px;" | Island Shop
500 Bells
| style="background-color:#ffffff; border-bottom: 4px solid #FFDD66; border-top-right-radius: 20px; border-bottom-right-radius: 20px;" | Island Shop
|-
| style="background-color:#ffffff; border-bottom: 4px solid #FFDD66; border-top-left-radius: 20px; border-bottom-left-radius: 20px;" | Diver Dan
| style="background-color:#ffffff; border-bottom: 4px solid #FFDD66; " |  | style="background-color:#ffffff; border-bottom: 4px solid #FFDD66; " | Furniture
| style="background-color:#ffffff; border-bottom: 4px solid #FFDD66; " |
| style="background-color:#ffffff; border-bottom: 4px solid #FFDD66; " | Furniture
| style="background-color:#ffffff; border-bottom: 4px solid #FFDD66; " | ![]() 60 medals
| style="background-color:#ffffff; border-bottom: 4px solid #FFDD66; " |
60 medals
| style="background-color:#ffffff; border-bottom: 4px solid #FFDD66; " | ![]() 750 Bells
| style="background-color:#ffffff; border-bottom: 4px solid #FFDD66; border-top-right-radius: 20px; border-bottom-right-radius: 20px;" | Island Shop
750 Bells
| style="background-color:#ffffff; border-bottom: 4px solid #FFDD66; border-top-right-radius: 20px; border-bottom-right-radius: 20px;" | Island Shop
|-
| style="background-color:#ffffff; border-bottom: 4px solid #FFDD66; border-top-left-radius: 20px; border-bottom-left-radius: 20px;" | Kitchen Island
| style="background-color:#ffffff; border-bottom: 4px solid #FFDD66; " |  | style="background-color:#ffffff; border-bottom: 4px solid #FFDD66; " | Furniture
| style="background-color:#ffffff; border-bottom: 4px solid #FFDD66; " |
| style="background-color:#ffffff; border-bottom: 4px solid #FFDD66; " | Furniture
| style="background-color:#ffffff; border-bottom: 4px solid #FFDD66; " | ![]() 30 medals
| style="background-color:#ffffff; border-bottom: 4px solid #FFDD66; " |
30 medals
| style="background-color:#ffffff; border-bottom: 4px solid #FFDD66; " | ![]() 375 Bells
| style="background-color:#ffffff; border-bottom: 4px solid #FFDD66; border-top-right-radius: 20px; border-bottom-right-radius: 20px;" | Island Shop
375 Bells
| style="background-color:#ffffff; border-bottom: 4px solid #FFDD66; border-top-right-radius: 20px; border-bottom-right-radius: 20px;" | Island Shop
|-
| style="background-color:#ffffff; border-bottom: 4px solid #FFDD66; border-top-left-radius: 20px; border-bottom-left-radius: 20px;" | Life Preserver
| style="background-color:#ffffff; border-bottom: 4px solid #FFDD66; " | _NL_Model.png) | style="background-color:#ffffff; border-bottom: 4px solid #FFDD66; " | Furniture
| style="background-color:#ffffff; border-bottom: 4px solid #FFDD66; " |
| style="background-color:#ffffff; border-bottom: 4px solid #FFDD66; " | Furniture
| style="background-color:#ffffff; border-bottom: 4px solid #FFDD66; " | ![]() 25 medals
| style="background-color:#ffffff; border-bottom: 4px solid #FFDD66; " |
25 medals
| style="background-color:#ffffff; border-bottom: 4px solid #FFDD66; " | ![]() 312 Bells
| style="background-color:#ffffff; border-bottom: 4px solid #FFDD66; border-top-right-radius: 20px; border-bottom-right-radius: 20px;" | Island Shop
312 Bells
| style="background-color:#ffffff; border-bottom: 4px solid #FFDD66; border-top-right-radius: 20px; border-bottom-right-radius: 20px;" | Island Shop
|-
| style="background-color:#ffffff; border-bottom: 4px solid #FFDD66; border-top-left-radius: 20px; border-bottom-left-radius: 20px;" | Life Ring
| style="background-color:#ffffff; border-bottom: 4px solid #FFDD66; " | _NL_Model.png) | style="background-color:#ffffff; border-bottom: 4px solid #FFDD66; " | Furniture
| style="background-color:#ffffff; border-bottom: 4px solid #FFDD66; " |
| style="background-color:#ffffff; border-bottom: 4px solid #FFDD66; " | Furniture
| style="background-color:#ffffff; border-bottom: 4px solid #FFDD66; " | ![]() 20 medals
| style="background-color:#ffffff; border-bottom: 4px solid #FFDD66; " |
20 medals
| style="background-color:#ffffff; border-bottom: 4px solid #FFDD66; " | ![]() 250 Bells
| style="background-color:#ffffff; border-bottom: 4px solid #FFDD66; border-top-right-radius: 20px; border-bottom-right-radius: 20px;" | Island Shop
250 Bells
| style="background-color:#ffffff; border-bottom: 4px solid #FFDD66; border-top-right-radius: 20px; border-bottom-right-radius: 20px;" | Island Shop
|-
| style="background-color:#ffffff; border-bottom: 4px solid #FFDD66; border-top-left-radius: 20px; border-bottom-left-radius: 20px;" | Mermaid Bed
| style="background-color:#ffffff; border-bottom: 4px solid #FFDD66; " |  | style="background-color:#ffffff; border-bottom: 4px solid #FFDD66; " | Furniture
| style="background-color:#ffffff; border-bottom: 4px solid #FFDD66; " |
| style="background-color:#ffffff; border-bottom: 4px solid #FFDD66; " | Furniture
| style="background-color:#ffffff; border-bottom: 4px solid #FFDD66; " | ![]() 40 medals
| style="background-color:#ffffff; border-bottom: 4px solid #FFDD66; " |
40 medals
| style="background-color:#ffffff; border-bottom: 4px solid #FFDD66; " | ![]() 500 Bells
| style="background-color:#ffffff; border-bottom: 4px solid #FFDD66; border-top-right-radius: 20px; border-bottom-right-radius: 20px;" | Island Shop
500 Bells
| style="background-color:#ffffff; border-bottom: 4px solid #FFDD66; border-top-right-radius: 20px; border-bottom-right-radius: 20px;" | Island Shop
|-
| style="background-color:#ffffff; border-bottom: 4px solid #FFDD66; border-top-left-radius: 20px; border-bottom-left-radius: 20px;" | Mermaid Chair
| style="background-color:#ffffff; border-bottom: 4px solid #FFDD66; " |  | style="background-color:#ffffff; border-bottom: 4px solid #FFDD66; " | Furniture
| style="background-color:#ffffff; border-bottom: 4px solid #FFDD66; " |
| style="background-color:#ffffff; border-bottom: 4px solid #FFDD66; " | Furniture
| style="background-color:#ffffff; border-bottom: 4px solid #FFDD66; " | ![]() 40 medals
| style="background-color:#ffffff; border-bottom: 4px solid #FFDD66; " |
40 medals
| style="background-color:#ffffff; border-bottom: 4px solid #FFDD66; " | ![]() 500 Bells
| style="background-color:#ffffff; border-bottom: 4px solid #FFDD66; border-top-right-radius: 20px; border-bottom-right-radius: 20px;" | Island Shop
500 Bells
| style="background-color:#ffffff; border-bottom: 4px solid #FFDD66; border-top-right-radius: 20px; border-bottom-right-radius: 20px;" | Island Shop
|-
| style="background-color:#ffffff; border-bottom: 4px solid #FFDD66; border-top-left-radius: 20px; border-bottom-left-radius: 20px;" | Mermaid Clock
| style="background-color:#ffffff; border-bottom: 4px solid #FFDD66; " |  | style="background-color:#ffffff; border-bottom: 4px solid #FFDD66; " | Furniture
| style="background-color:#ffffff; border-bottom: 4px solid #FFDD66; " |
| style="background-color:#ffffff; border-bottom: 4px solid #FFDD66; " | Furniture
| style="background-color:#ffffff; border-bottom: 4px solid #FFDD66; " | ![]() Medals
| style="background-color:#ffffff; border-bottom: 4px solid #FFDD66; " |
Medals
| style="background-color:#ffffff; border-bottom: 4px solid #FFDD66; " | ![]() Bells
| style="background-color:#ffffff; border-bottom: 4px solid #FFDD66; border-top-right-radius: 20px; border-bottom-right-radius: 20px;" | Island Shop
Bells
| style="background-color:#ffffff; border-bottom: 4px solid #FFDD66; border-top-right-radius: 20px; border-bottom-right-radius: 20px;" | Island Shop
|-
| style="background-color:#ffffff; border-bottom: 4px solid #FFDD66; border-top-left-radius: 20px; border-bottom-left-radius: 20px;" | Mermaid Closet
| style="background-color:#ffffff; border-bottom: 4px solid #FFDD66; " |  | style="background-color:#ffffff; border-bottom: 4px solid #FFDD66; " | Furniture
| style="background-color:#ffffff; border-bottom: 4px solid #FFDD66; " |
| style="background-color:#ffffff; border-bottom: 4px solid #FFDD66; " | Furniture
| style="background-color:#ffffff; border-bottom: 4px solid #FFDD66; " | ![]() 40 medals
| style="background-color:#ffffff; border-bottom: 4px solid #FFDD66; " |
40 medals
| style="background-color:#ffffff; border-bottom: 4px solid #FFDD66; " | ![]() 500 Bells
| style="background-color:#ffffff; border-bottom: 4px solid #FFDD66; border-top-right-radius: 20px; border-bottom-right-radius: 20px;" | Island Shop
500 Bells
| style="background-color:#ffffff; border-bottom: 4px solid #FFDD66; border-top-right-radius: 20px; border-bottom-right-radius: 20px;" | Island Shop
|-
| style="background-color:#ffffff; border-bottom: 4px solid #FFDD66; border-top-left-radius: 20px; border-bottom-left-radius: 20px;" | Mermaid Dresser
| style="background-color:#ffffff; border-bottom: 4px solid #FFDD66; " |  | style="background-color:#ffffff; border-bottom: 4px solid #FFDD66; " | Furniture
| style="background-color:#ffffff; border-bottom: 4px solid #FFDD66; " |
| style="background-color:#ffffff; border-bottom: 4px solid #FFDD66; " | Furniture
| style="background-color:#ffffff; border-bottom: 4px solid #FFDD66; " | ![]() 40 medals
| style="background-color:#ffffff; border-bottom: 4px solid #FFDD66; " |
40 medals
| style="background-color:#ffffff; border-bottom: 4px solid #FFDD66; " | ![]() 500 Bells
| style="background-color:#ffffff; border-bottom: 4px solid #FFDD66; border-top-right-radius: 20px; border-bottom-right-radius: 20px;" | Island Shop
500 Bells
| style="background-color:#ffffff; border-bottom: 4px solid #FFDD66; border-top-right-radius: 20px; border-bottom-right-radius: 20px;" | Island Shop
|-
| style="background-color:#ffffff; border-bottom: 4px solid #FFDD66; border-top-left-radius: 20px; border-bottom-left-radius: 20px;" | Mermaid Lamp
| style="background-color:#ffffff; border-bottom: 4px solid #FFDD66; " |  | style="background-color:#ffffff; border-bottom: 4px solid #FFDD66; " | Furniture
| style="background-color:#ffffff; border-bottom: 4px solid #FFDD66; " |
| style="background-color:#ffffff; border-bottom: 4px solid #FFDD66; " | Furniture
| style="background-color:#ffffff; border-bottom: 4px solid #FFDD66; " | ![]() 40 medals
| style="background-color:#ffffff; border-bottom: 4px solid #FFDD66; " |
40 medals
| style="background-color:#ffffff; border-bottom: 4px solid #FFDD66; " | ![]() 500 Bells
| style="background-color:#ffffff; border-bottom: 4px solid #FFDD66; border-top-right-radius: 20px; border-bottom-right-radius: 20px;" | Island Shop
500 Bells
| style="background-color:#ffffff; border-bottom: 4px solid #FFDD66; border-top-right-radius: 20px; border-bottom-right-radius: 20px;" | Island Shop
|-
| style="background-color:#ffffff; border-bottom: 4px solid #FFDD66; border-top-left-radius: 20px; border-bottom-left-radius: 20px;" | Mermaid Screen
| style="background-color:#ffffff; border-bottom: 4px solid #FFDD66; " |  | style="background-color:#ffffff; border-bottom: 4px solid #FFDD66; " | Furniture
| style="background-color:#ffffff; border-bottom: 4px solid #FFDD66; " |
| style="background-color:#ffffff; border-bottom: 4px solid #FFDD66; " | Furniture
| style="background-color:#ffffff; border-bottom: 4px solid #FFDD66; " | ![]() 40 medals
| style="background-color:#ffffff; border-bottom: 4px solid #FFDD66; " |
40 medals
| style="background-color:#ffffff; border-bottom: 4px solid #FFDD66; " | ![]() 500 Bells
| style="background-color:#ffffff; border-bottom: 4px solid #FFDD66; border-top-right-radius: 20px; border-bottom-right-radius: 20px;" | Island Shop
500 Bells
| style="background-color:#ffffff; border-bottom: 4px solid #FFDD66; border-top-right-radius: 20px; border-bottom-right-radius: 20px;" | Island Shop
|-
| style="background-color:#ffffff; border-bottom: 4px solid #FFDD66; border-top-left-radius: 20px; border-bottom-left-radius: 20px;" | Mermaid Shelf
| style="background-color:#ffffff; border-bottom: 4px solid #FFDD66; " |  | style="background-color:#ffffff; border-bottom: 4px solid #FFDD66; " | Furniture
| style="background-color:#ffffff; border-bottom: 4px solid #FFDD66; " |
| style="background-color:#ffffff; border-bottom: 4px solid #FFDD66; " | Furniture
| style="background-color:#ffffff; border-bottom: 4px solid #FFDD66; " | ![]() 40 medals
| style="background-color:#ffffff; border-bottom: 4px solid #FFDD66; " |
40 medals
| style="background-color:#ffffff; border-bottom: 4px solid #FFDD66; " | ![]() 500 Bells
| style="background-color:#ffffff; border-bottom: 4px solid #FFDD66; border-top-right-radius: 20px; border-bottom-right-radius: 20px;" | Island Shop
500 Bells
| style="background-color:#ffffff; border-bottom: 4px solid #FFDD66; border-top-right-radius: 20px; border-bottom-right-radius: 20px;" | Island Shop
|-
| style="background-color:#ffffff; border-bottom: 4px solid #FFDD66; border-top-left-radius: 20px; border-bottom-left-radius: 20px;" | Mermaid Sofa
| style="background-color:#ffffff; border-bottom: 4px solid #FFDD66; " |  | style="background-color:#ffffff; border-bottom: 4px solid #FFDD66; " | Furniture
| style="background-color:#ffffff; border-bottom: 4px solid #FFDD66; " |
| style="background-color:#ffffff; border-bottom: 4px solid #FFDD66; " | Furniture
| style="background-color:#ffffff; border-bottom: 4px solid #FFDD66; " | ![]() 40 medals
| style="background-color:#ffffff; border-bottom: 4px solid #FFDD66; " |
40 medals
| style="background-color:#ffffff; border-bottom: 4px solid #FFDD66; " | ![]() 500 Bells
| style="background-color:#ffffff; border-bottom: 4px solid #FFDD66; border-top-right-radius: 20px; border-bottom-right-radius: 20px;" | Island Shop
500 Bells
| style="background-color:#ffffff; border-bottom: 4px solid #FFDD66; border-top-right-radius: 20px; border-bottom-right-radius: 20px;" | Island Shop
|-
| style="background-color:#ffffff; border-bottom: 4px solid #FFDD66; border-top-left-radius: 20px; border-bottom-left-radius: 20px;" | Mermaid Table
| style="background-color:#ffffff; border-bottom: 4px solid #FFDD66; " |  | style="background-color:#ffffff; border-bottom: 4px solid #FFDD66; " | Furniture
| style="background-color:#ffffff; border-bottom: 4px solid #FFDD66; " |
| style="background-color:#ffffff; border-bottom: 4px solid #FFDD66; " | Furniture
| style="background-color:#ffffff; border-bottom: 4px solid #FFDD66; " | ![]() 40 medals
| style="background-color:#ffffff; border-bottom: 4px solid #FFDD66; " |
40 medals
| style="background-color:#ffffff; border-bottom: 4px solid #FFDD66; " | ![]() 500 Bells
| style="background-color:#ffffff; border-bottom: 4px solid #FFDD66; border-top-right-radius: 20px; border-bottom-right-radius: 20px;" | Island Shop
500 Bells
| style="background-color:#ffffff; border-bottom: 4px solid #FFDD66; border-top-right-radius: 20px; border-bottom-right-radius: 20px;" | Island Shop
|-
| style="background-color:#ffffff; border-bottom: 4px solid #FFDD66; border-top-left-radius: 20px; border-bottom-left-radius: 20px;" | Mermaid Vanity
| style="background-color:#ffffff; border-bottom: 4px solid #FFDD66; " |  | style="background-color:#ffffff; border-bottom: 4px solid #FFDD66; " | Furniture
| style="background-color:#ffffff; border-bottom: 4px solid #FFDD66; " |
| style="background-color:#ffffff; border-bottom: 4px solid #FFDD66; " | Furniture
| style="background-color:#ffffff; border-bottom: 4px solid #FFDD66; " | ![]() 40 medals
| style="background-color:#ffffff; border-bottom: 4px solid #FFDD66; " |
40 medals
| style="background-color:#ffffff; border-bottom: 4px solid #FFDD66; " | ![]() 500 Bells
| style="background-color:#ffffff; border-bottom: 4px solid #FFDD66; border-top-right-radius: 20px; border-bottom-right-radius: 20px;" | Island Shop
500 Bells
| style="background-color:#ffffff; border-bottom: 4px solid #FFDD66; border-top-right-radius: 20px; border-bottom-right-radius: 20px;" | Island Shop
|-
| style="background-color:#ffffff; border-bottom: 4px solid #FFDD66; border-top-left-radius: 20px; border-bottom-left-radius: 20px;" | Sand Castle
| style="background-color:#ffffff; border-bottom: 4px solid #FFDD66; " |  | style="background-color:#ffffff; border-bottom: 4px solid #FFDD66; " | Furniture
| style="background-color:#ffffff; border-bottom: 4px solid #FFDD66; " |
| style="background-color:#ffffff; border-bottom: 4px solid #FFDD66; " | Furniture
| style="background-color:#ffffff; border-bottom: 4px solid #FFDD66; " | ![]() 46 medals
| style="background-color:#ffffff; border-bottom: 4px solid #FFDD66; " |
46 medals
| style="background-color:#ffffff; border-bottom: 4px solid #FFDD66; " | ![]() 575 Bells
| style="background-color:#ffffff; border-bottom: 4px solid #FFDD66; border-top-right-radius: 20px; border-bottom-right-radius: 20px;" | Island Shop (Club Tortimer)
575 Bells
| style="background-color:#ffffff; border-bottom: 4px solid #FFDD66; border-top-right-radius: 20px; border-bottom-right-radius: 20px;" | Island Shop (Club Tortimer)
|-
| style="background-color:#ffffff; border-bottom: 4px solid #FFDD66; border-top-left-radius: 20px; border-bottom-left-radius: 20px;" | Sanshin
| style="background-color:#ffffff; border-bottom: 4px solid #FFDD66; " |  | style="background-color:#ffffff; border-bottom: 4px solid #FFDD66; " | Furniture
| style="background-color:#ffffff; border-bottom: 4px solid #FFDD66; " |
| style="background-color:#ffffff; border-bottom: 4px solid #FFDD66; " | Furniture
| style="background-color:#ffffff; border-bottom: 4px solid #FFDD66; " | ![]() 40 medals
| style="background-color:#ffffff; border-bottom: 4px solid #FFDD66; " |
40 medals
| style="background-color:#ffffff; border-bottom: 4px solid #FFDD66; " | ![]() 500 Bells
| style="background-color:#ffffff; border-bottom: 4px solid #FFDD66; border-top-right-radius: 20px; border-bottom-right-radius: 20px;" | Island Shop
500 Bells
| style="background-color:#ffffff; border-bottom: 4px solid #FFDD66; border-top-right-radius: 20px; border-bottom-right-radius: 20px;" | Island Shop
|-
| style="background-color:#ffffff; border-bottom: 4px solid #FFDD66; border-top-left-radius: 20px; border-bottom-left-radius: 20px;" | Sea Globe
| style="background-color:#ffffff; border-bottom: 4px solid #FFDD66; " |  | style="background-color:#ffffff; border-bottom: 4px solid #FFDD66; " | Furniture
| style="background-color:#ffffff; border-bottom: 4px solid #FFDD66; " |
| style="background-color:#ffffff; border-bottom: 4px solid #FFDD66; " | Furniture
| style="background-color:#ffffff; border-bottom: 4px solid #FFDD66; " | ![]() 20 medals
| style="background-color:#ffffff; border-bottom: 4px solid #FFDD66; " |
20 medals
| style="background-color:#ffffff; border-bottom: 4px solid #FFDD66; " | ![]() 250 Bells
| style="background-color:#ffffff; border-bottom: 4px solid #FFDD66; border-top-right-radius: 20px; border-bottom-right-radius: 20px;" | Island Shop (Club Tortimer)
250 Bells
| style="background-color:#ffffff; border-bottom: 4px solid #FFDD66; border-top-right-radius: 20px; border-bottom-right-radius: 20px;" | Island Shop (Club Tortimer)
|-
| style="background-color:#ffffff; border-bottom: 4px solid #FFDD66; border-top-left-radius: 20px; border-bottom-left-radius: 20px;" | Treasure Chest
| style="background-color:#ffffff; border-bottom: 4px solid #FFDD66; " |  | style="background-color:#ffffff; border-bottom: 4px solid #FFDD66; " | Furniture
| style="background-color:#ffffff; border-bottom: 4px solid #FFDD66; " |
| style="background-color:#ffffff; border-bottom: 4px solid #FFDD66; " | Furniture
| style="background-color:#ffffff; border-bottom: 4px solid #FFDD66; " | ![]() 150 medals
| style="background-color:#ffffff; border-bottom: 4px solid #FFDD66; " |
150 medals
| style="background-color:#ffffff; border-bottom: 4px solid #FFDD66; " | ![]() 1,875 Bells
| style="background-color:#ffffff; border-bottom: 4px solid #FFDD66; border-top-right-radius: 20px; border-bottom-right-radius: 20px;" | Island Shop
1,875 Bells
| style="background-color:#ffffff; border-bottom: 4px solid #FFDD66; border-top-right-radius: 20px; border-bottom-right-radius: 20px;" | Island Shop
|-
| style="background-color:#ffffff; border-bottom: 4px solid #FFDD66; border-top-left-radius: 20px; border-bottom-left-radius: 20px;" | Ukulele
| style="background-color:#ffffff; border-bottom: 4px solid #FFDD66; " |  | style="background-color:#ffffff; border-bottom: 4px solid #FFDD66; " | Furniture
| style="background-color:#ffffff; border-bottom: 4px solid #FFDD66; " |
| style="background-color:#ffffff; border-bottom: 4px solid #FFDD66; " | Furniture
| style="background-color:#ffffff; border-bottom: 4px solid #FFDD66; " | ![]() 30 medals
| style="background-color:#ffffff; border-bottom: 4px solid #FFDD66; " |
30 medals
| style="background-color:#ffffff; border-bottom: 4px solid #FFDD66; " | ![]() 375 Bells
| style="background-color:#ffffff; border-bottom: 4px solid #FFDD66; border-top-right-radius: 20px; border-bottom-right-radius: 20px;" | Island Shop (Club Tortimer)
375 Bells
| style="background-color:#ffffff; border-bottom: 4px solid #FFDD66; border-top-right-radius: 20px; border-bottom-right-radius: 20px;" | Island Shop (Club Tortimer)
|-
| style="background-color:#ffffff; border-bottom: 4px solid #FFDD66; border-top-left-radius: 20px; border-bottom-left-radius: 20px;" | Wave Breaker
| style="background-color:#ffffff; border-bottom: 4px solid #FFDD66; " |  | style="background-color:#ffffff; border-bottom: 4px solid #FFDD66; " | Furniture
| style="background-color:#ffffff; border-bottom: 4px solid #FFDD66; " |
| style="background-color:#ffffff; border-bottom: 4px solid #FFDD66; " | Furniture
| style="background-color:#ffffff; border-bottom: 4px solid #FFDD66; " | ![]() 35 medals
| style="background-color:#ffffff; border-bottom: 4px solid #FFDD66; " |
35 medals
| style="background-color:#ffffff; border-bottom: 4px solid #FFDD66; " | ![]() 437 Bells
| style="background-color:#ffffff; border-bottom: 4px solid #FFDD66; border-top-right-radius: 20px; border-bottom-right-radius: 20px;" | Island Shop
437 Bells
| style="background-color:#ffffff; border-bottom: 4px solid #FFDD66; border-top-right-radius: 20px; border-bottom-right-radius: 20px;" | Island Shop
|-
| style="background-color:#ffffff; border-bottom: 4px solid #FFDD66; border-top-left-radius: 20px; border-bottom-left-radius: 20px;" | Whirlpool Bath
| style="background-color:#ffffff; border-bottom: 4px solid #FFDD66; " | _NL_Model.png) | style="background-color:#ffffff; border-bottom: 4px solid #FFDD66; " | Furniture
| style="background-color:#ffffff; border-bottom: 4px solid #FFDD66; " |
| style="background-color:#ffffff; border-bottom: 4px solid #FFDD66; " | Furniture
| style="background-color:#ffffff; border-bottom: 4px solid #FFDD66; " | ![]() 70 medals
| style="background-color:#ffffff; border-bottom: 4px solid #FFDD66; " |
70 medals
| style="background-color:#ffffff; border-bottom: 4px solid #FFDD66; " | ![]() 875 Bells
| style="background-color:#ffffff; border-bottom: 4px solid #FFDD66; border-top-right-radius: 20px; border-bottom-right-radius: 20px;" | Island Shop (Club Tortimer)
875 Bells
| style="background-color:#ffffff; border-bottom: 4px solid #FFDD66; border-top-right-radius: 20px; border-bottom-right-radius: 20px;" | Island Shop (Club Tortimer)
|-
| style="background-color:#ffffff; border-bottom: 4px solid #FFDD66; border-top-left-radius: 20px; border-bottom-left-radius: 20px;" | Cabana Wall
| style="background-color:#ffffff; border-bottom: 4px solid #FFDD66; " |  | style="background-color:#ffffff; border-bottom: 4px solid #FFDD66; " | Wallpaper
| style="background-color:#ffffff; border-bottom: 4px solid #FFDD66; " |
| style="background-color:#ffffff; border-bottom: 4px solid #FFDD66; " | Wallpaper
| style="background-color:#ffffff; border-bottom: 4px solid #FFDD66; " | ![]() 40 medals
| style="background-color:#ffffff; border-bottom: 4px solid #FFDD66; " |
40 medals
| style="background-color:#ffffff; border-bottom: 4px solid #FFDD66; " | ![]() 500 Bells
| style="background-color:#ffffff; border-bottom: 4px solid #FFDD66; border-top-right-radius: 20px; border-bottom-right-radius: 20px;" | Island Shop (Club Tortimer)
500 Bells
| style="background-color:#ffffff; border-bottom: 4px solid #FFDD66; border-top-right-radius: 20px; border-bottom-right-radius: 20px;" | Island Shop (Club Tortimer)
|-
| style="background-color:#ffffff; border-bottom: 4px solid #FFDD66; border-top-left-radius: 20px; border-bottom-left-radius: 20px;" | Mermaid Wall
| style="background-color:#ffffff; border-bottom: 4px solid #FFDD66; " |  | style="background-color:#ffffff; border-bottom: 4px solid #FFDD66; " | Wallpaper
| style="background-color:#ffffff; border-bottom: 4px solid #FFDD66; " |
| style="background-color:#ffffff; border-bottom: 4px solid #FFDD66; " | Wallpaper
| style="background-color:#ffffff; border-bottom: 4px solid #FFDD66; " | ![]() 40 medals
| style="background-color:#ffffff; border-bottom: 4px solid #FFDD66; " |
40 medals
| style="background-color:#ffffff; border-bottom: 4px solid #FFDD66; " | ![]() 500 Bells
| style="background-color:#ffffff; border-bottom: 4px solid #FFDD66; border-top-right-radius: 20px; border-bottom-right-radius: 20px;" | Island Shop
500 Bells
| style="background-color:#ffffff; border-bottom: 4px solid #FFDD66; border-top-right-radius: 20px; border-bottom-right-radius: 20px;" | Island Shop
|-
| style="background-color:#ffffff; border-bottom: 4px solid #FFDD66; border-top-left-radius: 20px; border-bottom-left-radius: 20px;" | Tropical Vista
| style="background-color:#ffffff; border-bottom: 4px solid #FFDD66; " |  | style="background-color:#ffffff; border-bottom: 4px solid #FFDD66; " | Wallpaper
| style="background-color:#ffffff; border-bottom: 4px solid #FFDD66; " |
| style="background-color:#ffffff; border-bottom: 4px solid #FFDD66; " | Wallpaper
| style="background-color:#ffffff; border-bottom: 4px solid #FFDD66; " | ![]() 100 medals
| style="background-color:#ffffff; border-bottom: 4px solid #FFDD66; " |
100 medals
| style="background-color:#ffffff; border-bottom: 4px solid #FFDD66; " | ![]() 1,250 Bells
| style="background-color:#ffffff; border-bottom: 4px solid #FFDD66; border-top-right-radius: 20px; border-bottom-right-radius: 20px;" | Island Shop (Club Tortimer)
1,250 Bells
| style="background-color:#ffffff; border-bottom: 4px solid #FFDD66; border-top-right-radius: 20px; border-bottom-right-radius: 20px;" | Island Shop (Club Tortimer)
|-
| style="background-color:#ffffff; border-bottom: 4px solid #FFDD66; border-top-left-radius: 20px; border-bottom-left-radius: 20px;" | Cabana Flooring
| style="background-color:#ffffff; border-bottom: 4px solid #FFDD66; " |  | style="background-color:#ffffff; border-bottom: 4px solid #FFDD66; " | Flooring
| style="background-color:#ffffff; border-bottom: 4px solid #FFDD66; " |
| style="background-color:#ffffff; border-bottom: 4px solid #FFDD66; " | Flooring
| style="background-color:#ffffff; border-bottom: 4px solid #FFDD66; " | ![]() 40 medals
| style="background-color:#ffffff; border-bottom: 4px solid #FFDD66; " |
40 medals
| style="background-color:#ffffff; border-bottom: 4px solid #FFDD66; " | ![]() 500 Bells
| style="background-color:#ffffff; border-bottom: 4px solid #FFDD66; border-top-right-radius: 20px; border-bottom-right-radius: 20px;" | Island Shop (Club Tortimer)
500 Bells
| style="background-color:#ffffff; border-bottom: 4px solid #FFDD66; border-top-right-radius: 20px; border-bottom-right-radius: 20px;" | Island Shop (Club Tortimer)
|-
| style="background-color:#ffffff; border-bottom: 4px solid #FFDD66; border-top-left-radius: 20px; border-bottom-left-radius: 20px;" | Mermaid Carpet
| style="background-color:#ffffff; border-bottom: 4px solid #FFDD66; " |  | style="background-color:#ffffff; border-bottom: 4px solid #FFDD66; " | Flooring
| style="background-color:#ffffff; border-bottom: 4px solid #FFDD66; " |
| style="background-color:#ffffff; border-bottom: 4px solid #FFDD66; " | Flooring
| style="background-color:#ffffff; border-bottom: 4px solid #FFDD66; " | ![]() 40 medals
| style="background-color:#ffffff; border-bottom: 4px solid #FFDD66; " |
40 medals
| style="background-color:#ffffff; border-bottom: 4px solid #FFDD66; " | ![]() 500 Bells
| style="background-color:#ffffff; border-bottom: 4px solid #FFDD66; border-top-right-radius: 20px; border-bottom-right-radius: 20px;" | Island Shop
500 Bells
| style="background-color:#ffffff; border-bottom: 4px solid #FFDD66; border-top-right-radius: 20px; border-bottom-right-radius: 20px;" | Island Shop
|-
| style="background-color:#ffffff; border-bottom: 4px solid #FFDD66; border-top-left-radius: 20px; border-bottom-left-radius: 20px;" | Tropical Floor
| style="background-color:#ffffff; border-bottom: 4px solid #FFDD66; " |  | style="background-color:#ffffff; border-bottom: 4px solid #FFDD66; " | Flooring
| style="background-color:#ffffff; border-bottom: 4px solid #FFDD66; " |
| style="background-color:#ffffff; border-bottom: 4px solid #FFDD66; " | Flooring
| style="background-color:#ffffff; border-bottom: 4px solid #FFDD66; " | ![]() 100 medals
| style="background-color:#ffffff; border-bottom: 4px solid #FFDD66; " |
100 medals
| style="background-color:#ffffff; border-bottom: 4px solid #FFDD66; " | ![]() 1,250 Bells
| style="background-color:#ffffff; border-bottom: 4px solid #FFDD66; border-top-right-radius: 20px; border-bottom-right-radius: 20px;" | Island Shop (Club Tortimer)
1,250 Bells
| style="background-color:#ffffff; border-bottom: 4px solid #FFDD66; border-top-right-radius: 20px; border-bottom-right-radius: 20px;" | Island Shop (Club Tortimer)
|-
| style="background-color:#ffffff; border-bottom: 4px solid #FFDD66; border-top-left-radius: 20px; border-bottom-left-radius: 20px;" | Blue Aloha Tee
| style="background-color:#ffffff; border-bottom: 4px solid #FFDD66; " |  | style="background-color:#ffffff; border-bottom: 4px solid #FFDD66; " | Clothing
| style="background-color:#ffffff; border-bottom: 4px solid #FFDD66; " |
| style="background-color:#ffffff; border-bottom: 4px solid #FFDD66; " | Clothing
| style="background-color:#ffffff; border-bottom: 4px solid #FFDD66; " | ![]() 15 medals
| style="background-color:#ffffff; border-bottom: 4px solid #FFDD66; " |
15 medals
| style="background-color:#ffffff; border-bottom: 4px solid #FFDD66; " | ![]() 187 Bells
| style="background-color:#ffffff; border-bottom: 4px solid #FFDD66; border-top-right-radius: 20px; border-bottom-right-radius: 20px;" | Island Shop
187 Bells
| style="background-color:#ffffff; border-bottom: 4px solid #FFDD66; border-top-right-radius: 20px; border-bottom-right-radius: 20px;" | Island Shop
|-
| style="background-color:#ffffff; border-bottom: 4px solid #FFDD66; border-top-left-radius: 20px; border-bottom-left-radius: 20px;" | Kappa Costume
| style="background-color:#ffffff; border-bottom: 4px solid #FFDD66; " |  | style="background-color:#ffffff; border-bottom: 4px solid #FFDD66; " | Clothing
| style="background-color:#ffffff; border-bottom: 4px solid #FFDD66; " |
| style="background-color:#ffffff; border-bottom: 4px solid #FFDD66; " | Clothing
| style="background-color:#ffffff; border-bottom: 4px solid #FFDD66; " | ![]() 20 medals
| style="background-color:#ffffff; border-bottom: 4px solid #FFDD66; " |
20 medals
| style="background-color:#ffffff; border-bottom: 4px solid #FFDD66; " | ![]() 250 Bells
| style="background-color:#ffffff; border-bottom: 4px solid #FFDD66; border-top-right-radius: 20px; border-bottom-right-radius: 20px;" | Island Shop (Club Tortimer)
250 Bells
| style="background-color:#ffffff; border-bottom: 4px solid #FFDD66; border-top-right-radius: 20px; border-bottom-right-radius: 20px;" | Island Shop (Club Tortimer)
|-
| style="background-color:#ffffff; border-bottom: 4px solid #FFDD66; border-top-left-radius: 20px; border-bottom-left-radius: 20px;" | Red Aloha Tee
| style="background-color:#ffffff; border-bottom: 4px solid #FFDD66; " |  | style="background-color:#ffffff; border-bottom: 4px solid #FFDD66; " | Clothing
| style="background-color:#ffffff; border-bottom: 4px solid #FFDD66; " |
| style="background-color:#ffffff; border-bottom: 4px solid #FFDD66; " | Clothing
| style="background-color:#ffffff; border-bottom: 4px solid #FFDD66; " | ![]() 15 medals
| style="background-color:#ffffff; border-bottom: 4px solid #FFDD66; " |
15 medals
| style="background-color:#ffffff; border-bottom: 4px solid #FFDD66; " | ![]() 187 Bells
| style="background-color:#ffffff; border-bottom: 4px solid #FFDD66; border-top-right-radius: 20px; border-bottom-right-radius: 20px;" | Island Shop
187 Bells
| style="background-color:#ffffff; border-bottom: 4px solid #FFDD66; border-top-right-radius: 20px; border-bottom-right-radius: 20px;" | Island Shop
|-
| style="background-color:#ffffff; border-bottom: 4px solid #FFDD66; border-top-left-radius: 20px; border-bottom-left-radius: 20px;" | Yellow Aloha Tee
| style="background-color:#ffffff; border-bottom: 4px solid #FFDD66; " |  | style="background-color:#ffffff; border-bottom: 4px solid #FFDD66; " | Clothing
| style="background-color:#ffffff; border-bottom: 4px solid #FFDD66; " |
| style="background-color:#ffffff; border-bottom: 4px solid #FFDD66; " | Clothing
| style="background-color:#ffffff; border-bottom: 4px solid #FFDD66; " | ![]() 15 medals
| style="background-color:#ffffff; border-bottom: 4px solid #FFDD66; " |
15 medals
| style="background-color:#ffffff; border-bottom: 4px solid #FFDD66; " | ![]() 187 Bells
| style="background-color:#ffffff; border-bottom: 4px solid #FFDD66; border-top-right-radius: 20px; border-bottom-right-radius: 20px;" | Island Shop (Club Tortimer)
187 Bells
| style="background-color:#ffffff; border-bottom: 4px solid #FFDD66; border-top-right-radius: 20px; border-bottom-right-radius: 20px;" | Island Shop (Club Tortimer)
|-
| style="background-color:#ffffff; border-bottom: 4px solid #FFDD66; border-top-left-radius: 20px; border-bottom-left-radius: 20px;" | Aloha Shorts
| style="background-color:#ffffff; border-bottom: 4px solid #FFDD66; " |  | style="background-color:#ffffff; border-bottom: 4px solid #FFDD66; " | Clothing
| style="background-color:#ffffff; border-bottom: 4px solid #FFDD66; " |
| style="background-color:#ffffff; border-bottom: 4px solid #FFDD66; " | Clothing
| style="background-color:#ffffff; border-bottom: 4px solid #FFDD66; " | ![]() 15 medals
| style="background-color:#ffffff; border-bottom: 4px solid #FFDD66; " |
15 medals
| style="background-color:#ffffff; border-bottom: 4px solid #FFDD66; " | ![]() 187 Bells
| style="background-color:#ffffff; border-bottom: 4px solid #FFDD66; border-top-right-radius: 20px; border-bottom-right-radius: 20px;" | Island Shop
187 Bells
| style="background-color:#ffffff; border-bottom: 4px solid #FFDD66; border-top-right-radius: 20px; border-bottom-right-radius: 20px;" | Island Shop
|-
| style="background-color:#ffffff; border-bottom: 4px solid #FFDD66; border-top-left-radius: 20px; border-bottom-left-radius: 20px;" | Kappa-Costume Pants
| style="background-color:#ffffff; border-bottom: 4px solid #FFDD66; " |  | style="background-color:#ffffff; border-bottom: 4px solid #FFDD66; " | Clothing
| style="background-color:#ffffff; border-bottom: 4px solid #FFDD66; " |
| style="background-color:#ffffff; border-bottom: 4px solid #FFDD66; " | Clothing
| style="background-color:#ffffff; border-bottom: 4px solid #FFDD66; " | ![]() 15 medals
| style="background-color:#ffffff; border-bottom: 4px solid #FFDD66; " |
15 medals
| style="background-color:#ffffff; border-bottom: 4px solid #FFDD66; " | ![]() 187 Bells
| style="background-color:#ffffff; border-bottom: 4px solid #FFDD66; border-top-right-radius: 20px; border-bottom-right-radius: 20px;" | Island Shop
187 Bells
| style="background-color:#ffffff; border-bottom: 4px solid #FFDD66; border-top-right-radius: 20px; border-bottom-right-radius: 20px;" | Island Shop
|-
| style="background-color:#ffffff; border-bottom: 4px solid #FFDD66; border-top-left-radius: 20px; border-bottom-left-radius: 20px;" | Muumuu
| style="background-color:#ffffff; border-bottom: 4px solid #FFDD66; " |  | style="background-color:#ffffff; border-bottom: 4px solid #FFDD66; " | Clothing
| style="background-color:#ffffff; border-bottom: 4px solid #FFDD66; " |
| style="background-color:#ffffff; border-bottom: 4px solid #FFDD66; " | Clothing
| style="background-color:#ffffff; border-bottom: 4px solid #FFDD66; " | ![]() 15 medals
| style="background-color:#ffffff; border-bottom: 4px solid #FFDD66; " |
15 medals
| style="background-color:#ffffff; border-bottom: 4px solid #FFDD66; " | ![]() 187 Bells
| style="background-color:#ffffff; border-bottom: 4px solid #FFDD66; border-top-right-radius: 20px; border-bottom-right-radius: 20px;" | Island Shop
187 Bells
| style="background-color:#ffffff; border-bottom: 4px solid #FFDD66; border-top-right-radius: 20px; border-bottom-right-radius: 20px;" | Island Shop
|-
| style="background-color:#ffffff; border-bottom: 4px solid #FFDD66; border-top-left-radius: 20px; border-bottom-left-radius: 20px;" | Captain's Hat
| style="background-color:#ffffff; border-bottom: 4px solid #FFDD66; " |  | style="background-color:#ffffff; border-bottom: 4px solid #FFDD66; " | Clothing
| style="background-color:#ffffff; border-bottom: 4px solid #FFDD66; " |
| style="background-color:#ffffff; border-bottom: 4px solid #FFDD66; " | Clothing
| style="background-color:#ffffff; border-bottom: 4px solid #FFDD66; " | ![]() 15 medals
| style="background-color:#ffffff; border-bottom: 4px solid #FFDD66; " |
15 medals
| style="background-color:#ffffff; border-bottom: 4px solid #FFDD66; " | ![]() 187 Bells
| style="background-color:#ffffff; border-bottom: 4px solid #FFDD66; border-top-right-radius: 20px; border-bottom-right-radius: 20px;" | Island Shop
187 Bells
| style="background-color:#ffffff; border-bottom: 4px solid #FFDD66; border-top-right-radius: 20px; border-bottom-right-radius: 20px;" | Island Shop
|-
| style="background-color:#ffffff; border-bottom: 4px solid #FFDD66; border-top-left-radius: 20px; border-bottom-left-radius: 20px;" | Hibiscus Hairpin
| style="background-color:#ffffff; border-bottom: 4px solid #FFDD66; " |  | style="background-color:#ffffff; border-bottom: 4px solid #FFDD66; " | Clothing
| style="background-color:#ffffff; border-bottom: 4px solid #FFDD66; " |
| style="background-color:#ffffff; border-bottom: 4px solid #FFDD66; " | Clothing
| style="background-color:#ffffff; border-bottom: 4px solid #FFDD66; " | ![]() 20 medals
| style="background-color:#ffffff; border-bottom: 4px solid #FFDD66; " |
20 medals
| style="background-color:#ffffff; border-bottom: 4px solid #FFDD66; " | ![]() 250 Bells
| style="background-color:#ffffff; border-bottom: 4px solid #FFDD66; border-top-right-radius: 20px; border-bottom-right-radius: 20px;" | Island Shop
250 Bells
| style="background-color:#ffffff; border-bottom: 4px solid #FFDD66; border-top-right-radius: 20px; border-bottom-right-radius: 20px;" | Island Shop
|-
| style="background-color:#ffffff; border-bottom: 4px solid #FFDD66; border-top-left-radius: 20px; border-bottom-left-radius: 20px;" | Kappa Cap
| style="background-color:#ffffff; border-bottom: 4px solid #FFDD66; " |  | style="background-color:#ffffff; border-bottom: 4px solid #FFDD66; " | Clothing
| style="background-color:#ffffff; border-bottom: 4px solid #FFDD66; " |
| style="background-color:#ffffff; border-bottom: 4px solid #FFDD66; " | Clothing
| style="background-color:#ffffff; border-bottom: 4px solid #FFDD66; " | ![]() 20 medals
| style="background-color:#ffffff; border-bottom: 4px solid #FFDD66; " |
20 medals
| style="background-color:#ffffff; border-bottom: 4px solid #FFDD66; " | ![]() 250 Bells
| style="background-color:#ffffff; border-bottom: 4px solid #FFDD66; border-top-right-radius: 20px; border-bottom-right-radius: 20px;" | Island Shop (Club Tortimer)
250 Bells
| style="background-color:#ffffff; border-bottom: 4px solid #FFDD66; border-top-right-radius: 20px; border-bottom-right-radius: 20px;" | Island Shop (Club Tortimer)
|-
| style="background-color:#ffffff; border-bottom: 4px solid #FFDD66; border-top-left-radius: 20px; border-bottom-left-radius: 20px;" | Pirate's Hat
| style="background-color:#ffffff; border-bottom: 4px solid #FFDD66; " |  | style="background-color:#ffffff; border-bottom: 4px solid #FFDD66; " | Clothing
| style="background-color:#ffffff; border-bottom: 4px solid #FFDD66; " |
| style="background-color:#ffffff; border-bottom: 4px solid #FFDD66; " | Clothing
| style="background-color:#ffffff; border-bottom: 4px solid #FFDD66; " | ![]() 15 medals
| style="background-color:#ffffff; border-bottom: 4px solid #FFDD66; " |
15 medals
| style="background-color:#ffffff; border-bottom: 4px solid #FFDD66; " | ![]() 187 Bells
| style="background-color:#ffffff; border-bottom: 4px solid #FFDD66; border-top-right-radius: 20px; border-bottom-right-radius: 20px;" | Island Shop
187 Bells
| style="background-color:#ffffff; border-bottom: 4px solid #FFDD66; border-top-right-radius: 20px; border-bottom-right-radius: 20px;" | Island Shop
|-
| style="background-color:#ffffff; border-bottom: 4px solid #FFDD66; border-top-left-radius: 20px; border-bottom-left-radius: 20px;" | Sailor's Hat
| style="background-color:#ffffff; border-bottom: 4px solid #FFDD66; " |  | style="background-color:#ffffff; border-bottom: 4px solid #FFDD66; " | Clothing
| style="background-color:#ffffff; border-bottom: 4px solid #FFDD66; " |
| style="background-color:#ffffff; border-bottom: 4px solid #FFDD66; " | Clothing
| style="background-color:#ffffff; border-bottom: 4px solid #FFDD66; " | ![]() 15 medals
| style="background-color:#ffffff; border-bottom: 4px solid #FFDD66; " |
15 medals
| style="background-color:#ffffff; border-bottom: 4px solid #FFDD66; " | ![]() 187 Bells
| style="background-color:#ffffff; border-bottom: 4px solid #FFDD66; border-top-right-radius: 20px; border-bottom-right-radius: 20px;" | Island Shop
187 Bells
| style="background-color:#ffffff; border-bottom: 4px solid #FFDD66; border-top-right-radius: 20px; border-bottom-right-radius: 20px;" | Island Shop
|-
| style="background-color:#ffffff; border-bottom: 4px solid #FFDD66; border-top-left-radius: 20px; border-bottom-left-radius: 20px;" | Straw Hat
| style="background-color:#ffffff; border-bottom: 4px solid #FFDD66; " |  | style="background-color:#ffffff; border-bottom: 4px solid #FFDD66; " | Clothing
| style="background-color:#ffffff; border-bottom: 4px solid #FFDD66; " |
| style="background-color:#ffffff; border-bottom: 4px solid #FFDD66; " | Clothing
| style="background-color:#ffffff; border-bottom: 4px solid #FFDD66; " | ![]() 15 medals
| style="background-color:#ffffff; border-bottom: 4px solid #FFDD66; " |
15 medals
| style="background-color:#ffffff; border-bottom: 4px solid #FFDD66; " | ![]() 187 Bells
| style="background-color:#ffffff; border-bottom: 4px solid #FFDD66; border-top-right-radius: 20px; border-bottom-right-radius: 20px;" | Island Shop
187 Bells
| style="background-color:#ffffff; border-bottom: 4px solid #FFDD66; border-top-right-radius: 20px; border-bottom-right-radius: 20px;" | Island Shop
|-
| style="background-color:#ffffff; border-bottom: 4px solid #FFDD66; border-top-left-radius: 20px; border-bottom-left-radius: 20px;" | Snorkel Mask
| style="background-color:#ffffff; border-bottom: 4px solid #FFDD66; " |  | style="background-color:#ffffff; border-bottom: 4px solid #FFDD66; " | Clothing
| style="background-color:#ffffff; border-bottom: 4px solid #FFDD66; " |
| style="background-color:#ffffff; border-bottom: 4px solid #FFDD66; " | Clothing
| style="background-color:#ffffff; border-bottom: 4px solid #FFDD66; " | ![]() 20 medals
| style="background-color:#ffffff; border-bottom: 4px solid #FFDD66; " |
20 medals
| style="background-color:#ffffff; border-bottom: 4px solid #FFDD66; " | ![]() 250 Bells
| style="background-color:#ffffff; border-bottom: 4px solid #FFDD66; border-top-right-radius: 20px; border-bottom-right-radius: 20px;" | Island Shop
250 Bells
| style="background-color:#ffffff; border-bottom: 4px solid #FFDD66; border-top-right-radius: 20px; border-bottom-right-radius: 20px;" | Island Shop
|-
| style="background-color:#ffffff; border-bottom: 4px solid #FFDD66; border-top-left-radius: 20px; border-bottom-left-radius: 20px;" | Flip-Flops
| style="background-color:#ffffff; border-bottom: 4px solid #FFDD66; " |  | style="background-color:#ffffff; border-bottom: 4px solid #FFDD66; " | Clothing
| style="background-color:#ffffff; border-bottom: 4px solid #FFDD66; " |
| style="background-color:#ffffff; border-bottom: 4px solid #FFDD66; " | Clothing
| style="background-color:#ffffff; border-bottom: 4px solid #FFDD66; " | ![]() 20 medals
| style="background-color:#ffffff; border-bottom: 4px solid #FFDD66; " |
20 medals
| style="background-color:#ffffff; border-bottom: 4px solid #FFDD66; " | ![]() 250 Bells
| style="background-color:#ffffff; border-bottom: 4px solid #FFDD66; border-top-right-radius: 20px; border-bottom-right-radius: 20px;" | Island Shop
250 Bells
| style="background-color:#ffffff; border-bottom: 4px solid #FFDD66; border-top-right-radius: 20px; border-bottom-right-radius: 20px;" | Island Shop
|-
| style="background-color:#ffffff; border-bottom: 4px solid #FFDD66; border-top-left-radius: 20px; border-bottom-left-radius: 20px;" | Black Wet Suit
| style="background-color:#ffffff; border-bottom: 4px solid #FFDD66; " |  | style="background-color:#ffffff; border-bottom: 4px solid #FFDD66; " | Clothing
| style="background-color:#ffffff; border-bottom: 4px solid #FFDD66; " |
| style="background-color:#ffffff; border-bottom: 4px solid #FFDD66; " | Clothing
| style="background-color:#ffffff; border-bottom: 4px solid #FFDD66; " | ![]() 40 medals
| style="background-color:#ffffff; border-bottom: 4px solid #FFDD66; " |
40 medals
| style="background-color:#ffffff; border-bottom: 4px solid #FFDD66; " | ![]() 500 Bells
| style="background-color:#ffffff; border-bottom: 4px solid #FFDD66; border-top-right-radius: 20px; border-bottom-right-radius: 20px;" | Island Shop
500 Bells
| style="background-color:#ffffff; border-bottom: 4px solid #FFDD66; border-top-right-radius: 20px; border-bottom-right-radius: 20px;" | Island Shop
|-
| style="background-color:#ffffff; border-bottom: 4px solid #FFDD66; border-top-left-radius: 20px; border-bottom-left-radius: 20px;" | Blue Wet Suit
| style="background-color:#ffffff; border-bottom: 4px solid #FFDD66; " |  | style="background-color:#ffffff; border-bottom: 4px solid #FFDD66; " | Clothing
| style="background-color:#ffffff; border-bottom: 4px solid #FFDD66; " |
| style="background-color:#ffffff; border-bottom: 4px solid #FFDD66; " | Clothing
| style="background-color:#ffffff; border-bottom: 4px solid #FFDD66; " | ![]() 40 medals
| style="background-color:#ffffff; border-bottom: 4px solid #FFDD66; " |
40 medals
| style="background-color:#ffffff; border-bottom: 4px solid #FFDD66; " | ![]() 500 Bells
| style="background-color:#ffffff; border-bottom: 4px solid #FFDD66; border-top-right-radius: 20px; border-bottom-right-radius: 20px;" | Island Shop
500 Bells
| style="background-color:#ffffff; border-bottom: 4px solid #FFDD66; border-top-right-radius: 20px; border-bottom-right-radius: 20px;" | Island Shop
|-
| style="background-color:#ffffff; border-bottom: 4px solid #FFDD66; border-top-left-radius: 20px; border-bottom-left-radius: 20px;" | Green Wet Suit
| style="background-color:#ffffff; border-bottom: 4px solid #FFDD66; " |  | style="background-color:#ffffff; border-bottom: 4px solid #FFDD66; " | Clothing
| style="background-color:#ffffff; border-bottom: 4px solid #FFDD66; " |
| style="background-color:#ffffff; border-bottom: 4px solid #FFDD66; " | Clothing
| style="background-color:#ffffff; border-bottom: 4px solid #FFDD66; " | ![]() 40 medals
| style="background-color:#ffffff; border-bottom: 4px solid #FFDD66; " |
40 medals
| style="background-color:#ffffff; border-bottom: 4px solid #FFDD66; " | ![]() 500 Bells
| style="background-color:#ffffff; border-bottom: 4px solid #FFDD66; border-top-right-radius: 20px; border-bottom-right-radius: 20px;" | Island Shop
500 Bells
| style="background-color:#ffffff; border-bottom: 4px solid #FFDD66; border-top-right-radius: 20px; border-bottom-right-radius: 20px;" | Island Shop
|-
| style="background-color:#ffffff; border-bottom: 4px solid #FFDD66; border-top-left-radius: 20px; border-bottom-left-radius: 20px;" | Orange Wet Suit
| style="background-color:#ffffff; border-bottom: 4px solid #FFDD66; " |  | style="background-color:#ffffff; border-bottom: 4px solid #FFDD66; " | Clothing
| style="background-color:#ffffff; border-bottom: 4px solid #FFDD66; " |
| style="background-color:#ffffff; border-bottom: 4px solid #FFDD66; " | Clothing
| style="background-color:#ffffff; border-bottom: 4px solid #FFDD66; " | ![]() 40 medals
| style="background-color:#ffffff; border-bottom: 4px solid #FFDD66; " |
40 medals
| style="background-color:#ffffff; border-bottom: 4px solid #FFDD66; " | ![]() 500 Bells
| style="background-color:#ffffff; border-bottom: 4px solid #FFDD66; border-top-right-radius: 20px; border-bottom-right-radius: 20px;" | Island Shop
500 Bells
| style="background-color:#ffffff; border-bottom: 4px solid #FFDD66; border-top-right-radius: 20px; border-bottom-right-radius: 20px;" | Island Shop
|-
| style="background-color:#ffffff; border-bottom: 4px solid #FFDD66; border-top-left-radius: 20px; border-bottom-left-radius: 20px;" | Pink Wet Suit
| style="background-color:#ffffff; border-bottom: 4px solid #FFDD66; " |  | style="background-color:#ffffff; border-bottom: 4px solid #FFDD66; " | Clothing
| style="background-color:#ffffff; border-bottom: 4px solid #FFDD66; " |
| style="background-color:#ffffff; border-bottom: 4px solid #FFDD66; " | Clothing
| style="background-color:#ffffff; border-bottom: 4px solid #FFDD66; " | ![]() 40 medals
| style="background-color:#ffffff; border-bottom: 4px solid #FFDD66; " |
40 medals
| style="background-color:#ffffff; border-bottom: 4px solid #FFDD66; " | ![]() 500 Bells
| style="background-color:#ffffff; border-bottom: 4px solid #FFDD66; border-top-right-radius: 20px; border-bottom-right-radius: 20px;" | Island Shop
500 Bells
| style="background-color:#ffffff; border-bottom: 4px solid #FFDD66; border-top-right-radius: 20px; border-bottom-right-radius: 20px;" | Island Shop
|-
| style="background-color:#ffffff; border-bottom: 4px solid #FFDD66; border-top-left-radius: 20px; border-bottom-left-radius: 20px;" | Striped Wet Suit
| style="background-color:#ffffff; border-bottom: 4px solid #FFDD66; " |  | style="background-color:#ffffff; border-bottom: 4px solid #FFDD66; " | Clothing
| style="background-color:#ffffff; border-bottom: 4px solid #FFDD66; " |
| style="background-color:#ffffff; border-bottom: 4px solid #FFDD66; " | Clothing
| style="background-color:#ffffff; border-bottom: 4px solid #FFDD66; " | ![]() 40 medals
| style="background-color:#ffffff; border-bottom: 4px solid #FFDD66; " |
40 medals
| style="background-color:#ffffff; border-bottom: 4px solid #FFDD66; " | ![]() 500 Bells
| style="background-color:#ffffff; border-bottom: 4px solid #FFDD66; border-top-right-radius: 20px; border-bottom-right-radius: 20px;" | Island Shop
500 Bells
| style="background-color:#ffffff; border-bottom: 4px solid #FFDD66; border-top-right-radius: 20px; border-bottom-right-radius: 20px;" | Island Shop
|-
| style="background-color:#ffffff; border-bottom: 4px solid #FFDD66; border-top-left-radius: 20px; border-bottom-left-radius: 20px;" | White Wet Suit
| style="background-color:#ffffff; border-bottom: 4px solid #FFDD66; " |  | style="background-color:#ffffff; border-bottom: 4px solid #FFDD66; " | Clothing
| style="background-color:#ffffff; border-bottom: 4px solid #FFDD66; " |
| style="background-color:#ffffff; border-bottom: 4px solid #FFDD66; " | Clothing
| style="background-color:#ffffff; border-bottom: 4px solid #FFDD66; " | ![]() 40 medals
| style="background-color:#ffffff; border-bottom: 4px solid #FFDD66; " |
40 medals
| style="background-color:#ffffff; border-bottom: 4px solid #FFDD66; " | ![]() 500 Bells
| style="background-color:#ffffff; border-bottom: 4px solid #FFDD66; border-top-right-radius: 20px; border-bottom-right-radius: 20px;" | Island Shop
500 Bells
| style="background-color:#ffffff; border-bottom: 4px solid #FFDD66; border-top-right-radius: 20px; border-bottom-right-radius: 20px;" | Island Shop
|-
| style="background-color:#ffffff; border-bottom: 4px solid #FFDD66; border-top-left-radius: 20px; border-bottom-left-radius: 20px;" | Silver Axe
| style="background-color:#ffffff; border-bottom: 4px solid #FFDD66; " | ![]() | style="background-color:#ffffff; border-bottom: 4px solid #FFDD66; " | Equipment
| style="background-color:#ffffff; border-bottom: 4px solid #FFDD66; " |
| style="background-color:#ffffff; border-bottom: 4px solid #FFDD66; " | Equipment
| style="background-color:#ffffff; border-bottom: 4px solid #FFDD66; " | ![]() 8 medals
| style="background-color:#ffffff; border-bottom: 4px solid #FFDD66; " |
8 medals
| style="background-color:#ffffff; border-bottom: 4px solid #FFDD66; " | ![]() 100 Bells
| style="background-color:#ffffff; border-bottom: 4px solid #FFDD66; border-top-right-radius: 20px; border-bottom-right-radius: 20px;" | Island Shop (Club Tortimer)
100 Bells
| style="background-color:#ffffff; border-bottom: 4px solid #FFDD66; border-top-right-radius: 20px; border-bottom-right-radius: 20px;" | Island Shop (Club Tortimer)
|-
| style="background-color:#ffffff; border-bottom: 4px solid #FFDD66; border-top-left-radius: 20px; border-bottom-left-radius: 20px;" | Toy Hammer
| style="background-color:#ffffff; border-bottom: 4px solid #FFDD66; " | ![]() | style="background-color:#ffffff; border-bottom: 4px solid #FFDD66; " | Equipment
| style="background-color:#ffffff; border-bottom: 4px solid #FFDD66; " |
| style="background-color:#ffffff; border-bottom: 4px solid #FFDD66; " | Equipment
| style="background-color:#ffffff; border-bottom: 4px solid #FFDD66; " | ![]() 10 medals
| style="background-color:#ffffff; border-bottom: 4px solid #FFDD66; " |
10 medals
| style="background-color:#ffffff; border-bottom: 4px solid #FFDD66; " | ![]() 125 Bells
| style="background-color:#ffffff; border-bottom: 4px solid #FFDD66; border-top-right-radius: 20px; border-bottom-right-radius: 20px;" | Island Shop
125 Bells
| style="background-color:#ffffff; border-bottom: 4px solid #FFDD66; border-top-right-radius: 20px; border-bottom-right-radius: 20px;" | Island Shop
|-
| style="background-color:#ffffff; border-bottom: 4px solid #FFDD66; border-top-left-radius: 20px; border-bottom-left-radius: 20px;" | Red-Hibiscus Start
| style="background-color:#ffffff; border-bottom: 4px solid #FFDD66; " | ![]() | style="background-color:#ffffff; border-bottom: 4px solid #FFDD66; " | Other
| style="background-color:#ffffff; border-bottom: 4px solid #FFDD66; " |
| style="background-color:#ffffff; border-bottom: 4px solid #FFDD66; " | Other
| style="background-color:#ffffff; border-bottom: 4px solid #FFDD66; " | ![]() 5 medals
| style="background-color:#ffffff; border-bottom: 4px solid #FFDD66; " |
5 medals
| style="background-color:#ffffff; border-bottom: 4px solid #FFDD66; " | ![]() 62 Bells
| style="background-color:#ffffff; border-bottom: 4px solid #FFDD66; border-top-right-radius: 20px; border-bottom-right-radius: 20px;" | Island Shop
62 Bells
| style="background-color:#ffffff; border-bottom: 4px solid #FFDD66; border-top-right-radius: 20px; border-bottom-right-radius: 20px;" | Island Shop
|-
| style="background-color:#ffffff; border-bottom: 4px solid #FFDD66; border-top-left-radius: 20px; border-bottom-left-radius: 20px;" | Y.-Hibiscus Start
| style="background-color:#ffffff; border-bottom: 4px solid #FFDD66; " | ![]() | style="background-color:#ffffff; border-bottom: 4px solid #FFDD66; " | Other
| style="background-color:#ffffff; border-bottom: 4px solid #FFDD66; " |
| style="background-color:#ffffff; border-bottom: 4px solid #FFDD66; " | Other
| style="background-color:#ffffff; border-bottom: 4px solid #FFDD66; " | ![]() 5 medals
| style="background-color:#ffffff; border-bottom: 4px solid #FFDD66; " |
5 medals
| style="background-color:#ffffff; border-bottom: 4px solid #FFDD66; " | ![]() 62 Bells
| style="background-color:#ffffff; border-bottom: 4px solid #FFDD66; border-top-right-radius: 20px; border-bottom-right-radius: 20px;" | Island Shop
62 Bells
| style="background-color:#ffffff; border-bottom: 4px solid #FFDD66; border-top-right-radius: 20px; border-bottom-right-radius: 20px;" | Island Shop
|-
|}
Leila's supermarket

The player can speak to Leila to "play supermarket," where items can be sold to her for 5% of their standard sell price.
Beach area

The outside of Tortimer Island consists of a grassy center surrounded by beach. By default, exotic fruit trees,[nb 1] hibiscus bushes, and flowers are in the grassy area, while either Coconut or Banana trees line the beach. Additionally, shells spawn on the shore each day.
Lloid appears near the entrance to the building and lets the player borrow rental tools.
Creatures
The creatures on the island are the same year-round, and some can only be caught on the island.
 = Found exclusively on Tortimer Island.
Bugs
List of bugs on Tortimer Island in Animal Crossing: New Leaf
| # | Name | Icon | Sell price[nb 2] | Size | Location | Rarity | Time |
|---|---|---|---|---|---|---|---|
| 3 | Tiger butterfly | 114 mm | Flying near red and pink flowers | Uncommon (E) | 8 AM – 5 PM | ||
| 4 | Peacock butterfly | 133 mm | Flying near blue, purple, and black flowers | Very uncommon (D) | 8 AM – 5 PM | ||
| 5 | Monarch butterfly | Flying near flowers | Common (F) | 8 AM – 5 PM | |||
| 6 | Emperor butterfly | 146 mm | Flying near flowers | Rare (C) | 7 PM – 8 AM | ||
| 7 | Agrias butterfly | Flying near flowers | Rare (C) | 8 AM – 5 PM | |||
| 9 | Birdwing butterfly | Flying near flowers | Very rare (B) | 8 AM – 4 PM | |||
| 11 | Oak silk moth | 320 mm | On trees (any kind) | Very rare (B) | 7 PM – 4 AM | ||
| 14 | Long locust | 60 mm | On the ground | Common (F) | 8 AM – 7 PM | ||
| 15 | Migratory locust | 50 mm | On the ground | Uncommon (E) | 8 AM – 7 PM | ||
| 17 | Mantis | 82 mm | On flowers | Very uncommon (D) | 8 AM – 5 PM | ||
| 18 | Orchid mantis | 25 mm | On white flowers | Very rare (B) | 8 AM – 5 PM | ||
| 25 | Lantern fly | On trees (hardwood and cedar) | Rare (C) | 4 PM – 8 AM | |||
| 37 | Grasshopper | 34 mm | On the ground | Common (F) | 8 AM – 5 PM | ||
| 40 | Walking stick | 85 mm | On trees (any kind) | Very uncommon (D) | 4 AM – 8 AM & 5 PM – 7 PM | ||
| 44 | Longhorn Beetle | 52 mm | On tree stumps | Very common (G) | 11 PM – 7 PM | ||
| 45 | Tiger beetle | On the ground | Rare (C) | 4 PM – 11 PM | |||
| 47 | Wharf roach | 42 mm | On beach | Very common (G) | All day | ||
| 48 | Hermit crab |
40 mm | On beach | Uncommon (E) | 7 PM – 8 AM | ||
| 50 | Fruit beetle | 20 mm | On trees (any kind) | Common (F) | All day | ||
| 51 | Scarab beetle | 32 mm | On trees (any kind) | Very rare (B) | 11 PM – 8 AM | ||
| 52 | Jewel beetle | 35 mm | On trees (any kind) | Very uncommon (D) | 8 AM – 5 PM | ||
| 53 | Miyama stag | 60 mm | On trees (any kind) | Very uncommon (D) | All day | ||
| 54 | Saw stag | 54 mm | On trees (any kind) | Rare (C) | All day | ||
| 55 | Giant stag | 55 mm | On trees (any kind) | Rare (C) | 11 PM – 8 AM | ||
| 56 | Rainbow stag | 60 mm | On trees (any kind) | Very rare (B) | 5 PM – 8 AM | ||
| 57 | Cyclommatus stag | On palm trees | Very rare (B) | 5 PM – 8 AM | |||
| 58 | Golden stag | 62 mm | On palm trees | Mythical (A) | 5 PM – 8 AM | ||
| 59 | Horned dynastid | 72 mm | On trees (any kind) | Very uncommon (D) | 5 PM – 8 AM | ||
| 60 | Horned atlas | 152 mm | On palm trees | Very rare (B) | 5 PM – 8 AM | ||
| 61 | Horned elephant | 155.1 mm | On palm trees | Rare (C) | 5 PM – 8 AM | ||
| 62 | Horned hercules | 160 mm | On palm trees | Mythical (A) | 5 PM – 8 AM | ||
| 63 | Goliath beetle | 108 mm | On palm trees | Very rare (B) | 5 PM – 8 AM |
Fish
List of fish on Tortimer Island in Animal Crossing: New Leaf
| # | Name | Icon | Sell price[nb 2] | Shadow size | Fish size | Times |
|---|---|---|---|---|---|---|
| 44 | Sea horse |  Tiny Tiny
|
8 cm | All day | ||
| 45 | Clown fish | Tiny
|
15 cm | All day | ||
| 46 | Surgeonfish |  Small Small
|
31 cm | All day | ||
| 47 | Butterfly fish | Small
|
18 cm | All day | ||
| 48 | Napoleonfish |  Huge Huge
|
180 cm | 4 AM – 9 PM | ||
| 49 | Zebra turkeyfish |  Medium Medium
|
30 cm | All day | ||
| 51 | Puffer fish | Medium
|
35 cm | All day | ||
| 52 | Horse mackerel | Small
|
40 cm | All day | ||
| 53 | Barred knifejaw | Medium
|
60 cm | All day | ||
| 54 | Sea bass |  Very Large Very Large
|
100 cm | All day | ||
| 55 | Red snapper | Medium
|
90 cm | All day | ||
| 57 | Olive flounder |  Large Large
|
80 cm | All day | ||
| 58 | Squid | Medium
|
35 cm | All day | ||
| 59 | Moray eel | Very Large
|
80 cm | All day | ||
| 60 | Ribbon eel |
 Long Long
|
120 cm | All day | ||
| 63 | Blue marlin | Huge
|
220 cm | All day | ||
| 64 | Giant trevally |
Very Large
|
180 cm | All day | ||
| 65 | Ray | Very Large
|
120 cm | 4 AM – 9 PM | ||
| 66 | Ocean sunfish | ") Huge (finned) Huge (finned)
|
300 cm | 4 AM – 9 PM | ||
| 67 | Hammerhead shark | Huge (finned)
|
250 cm | 4 PM – 9 AM | ||
| 68 | Shark | Huge (finned)
|
540 cm | 4 PM – 9 AM | ||
| 69 | Saw shark | Huge (finned)
|
150 cm | 4 PM – 9 AM | ||
| 70 | Whale shark |
Huge (finned)
|
600 cm | All day |
Sea creatures
List of sea creatures on Tortimer Island in Animal Crossing: New Leaf
| # | Name | Icon | Sell price[nb 2] | Shadow size | Shadow movement | Size | Time |
|---|---|---|---|---|---|---|---|
| 1 | Seaweed | Large | Stationary | 80 cm | All day | ||
| 2 | Sea grapes | Small | Stationary | 20 cm | All day | ||
| 3 | Sea urchin | Small | Stationary | 12 cm | All day | ||
| 4 | Acorn barnacle | Tiny | Stationary | 3 cm | All day | ||
| 7 | Abalone | Medium | Uniform | 18 cm | 4 PM – 9 AM | ||
| 8 | Ear shell | Small | Uniform | 7 cm | 4 PM – 9 AM | ||
| 11 | Scallop | Medium | Erratic | 14 cm | All day | ||
| 12 | Sea anemone | Medium | Stationary | 20 cm | All day | ||
| 13 | Sea star | Small | Uniform | 25 cm | All day | ||
| 15 | Sea slug | Small | Uniform | 4 cm | All day | ||
| 16 | Flatworm | Small | Uniform | 4 cm | 4 PM – 9 AM | ||
| 17 | Mantis shrimp | Small | Erratic | 12 cm | 4 PM – 9 AM | ||
| 19 | Tiger Prawn | Small | Uniform | 20 cm | 4 PM – 9 AM | ||
| 21 | Lobster | Large | Uniform | 50 cm | All day | ||
| 26 | Octopus | Medium | Erratic | 50 cm | All day | ||
| 27 | Spotted garden eel |
Small | Stationary | 17 cm | All day | ||
| 28 | Chambered nautilus |
Medium | Uniform | 35 cm | All day | ||
| 30 | Giant isopod |
Medium | Uniform | 30 cm | All day |
Club Tortimer
Club Tortimer is a feature that allows the player to meet at a version of Tortimer Island with other random players online. The application form for Club Tortimer can be purchased from the island shop for 50 medals. When playing online via Club Tortimer, the Souvenir Shop can sell exclusive items not available in singleplayer.
Other appearances
In the Super Smash Bros. series

In the Super Smash Bros. series, Tortimer Island is featured as a stage in Super Smash Bros. for Nintendo 3DS and Super Smash Bros. Ultimate.
Gallery

Four players in the lobby
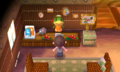
The tour counter
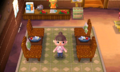
The tour waiting area

Leilani asking the player if they want to return to the mainland
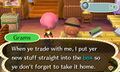
Grams telling the player about the Souvenir Shop
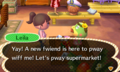
The player playing supermarket with Leila
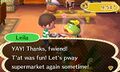
The player playing supermarket with Leila
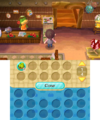
The player accessing the Items Drop-Off Box
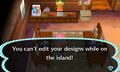
Designs cannot be edited on Tortimer Island
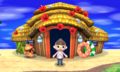
The exterior of the lobby

The player running around the island
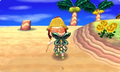
The player showing off a Birdwing Butterfly on the island
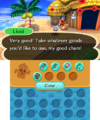
The player renting tools from Lloid


Notes
- ↑ The fruit on the trees can either be Durians, Lemons, Lychees, or Mangoes.
- ↑ 2.0 2.1 2.2 Re-Tail sell price; if item can be sold at Timmy and Tommy's store, it is 80% of the sell price; if item can be sold to Leila at Tortimer Island, it is 5% of the sell price.
| Locations | ||||||||||||||||||||||||
|---|---|---|---|---|---|---|---|---|---|---|---|---|---|---|---|---|---|---|---|---|---|---|---|---|
| ||||||||||||||||||||||||